
The color flags are available in green, orange, red and black. In the default settings, they are named yes, no, maybe and final.
Starting with the Pro plan, you can customize the color flags to fit your own workflow and make it perfectly clear to your clients what a color flag means: to do this, you can change the name of the color in the Color flags section of your Default Gallery Settings.
A possible version could look like this:
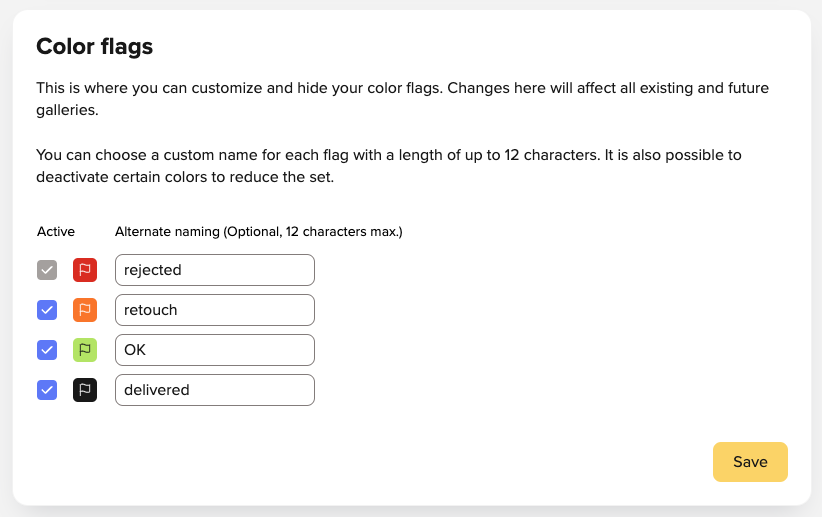
Please do not forget to save the new names for your color flags.
The name you assign to your color flags will then be displayed to you and your clients on every file that has that color flag.
Please note: Renaming your color flags will affect all color flags in your picdrop account. Even existing color flags in previous galleries will be labeled with the new name after saving.
You don’t want to use all four color flags? You only want to activate some of them? This is also possible! You can find more information here.
The default settings for your picdrop account include four color flags: red, orange, green and black. They are named no, maybe, yes and final.
If you want to use color flags in your workflow, e.g. only for a simple YES or NO for individual files, you can always deactivate those colors you don’t need in the gallery preferences:
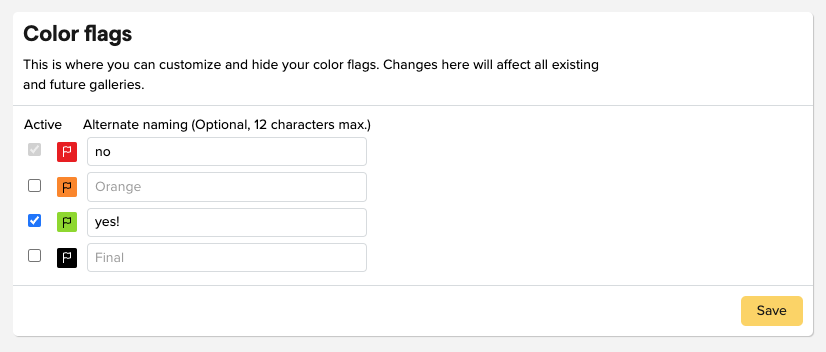
Uncheck the blue checkbox in front of the color flag, like done in the screenshot for the orange and the black color flag. They will then no longer be displayed in all your galleries (including existing ones).
Don’t worry: if you have accidentally hidden a color flag, you can of course re-activate it. All files that already had this color flag will keep this color flag.
You want to change the names of the color flags like in the screenshot? You can find the instructions here.
By the way, you can use the function for hiding individual color flags – just like Presentation Mode – starting with the Pro plan.
PS: The red color flag cannot be deactivated. It is needed so that your clients can hide red marked files in Presentation Mode. You can find out how to do this here.
Each gallery you create in picdrop can have a gallery image.
You see the gallery image as an icon for the gallery – just like a cover page.
You are logged in as admin in your picdrop account.
Then you can see the gallery images here:

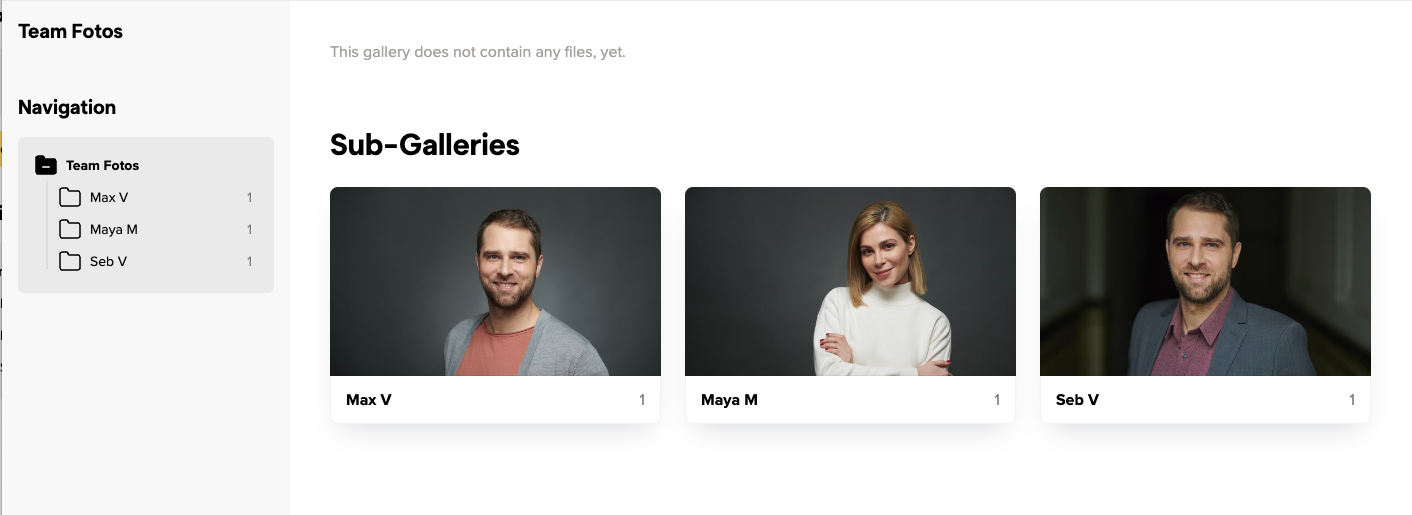
In a gallery that contains subgalleries, visitors will see the gallery images for those subgalleries.
It looks like this for your customers:
Do you work with client logins?
Then your customers will also see the gallery images in their personal gallery overview after they have entered their access code.
We always take the first image loaded into the gallery and automatically set it as the gallery image for you.
Galleries that do not contain images therefore do not get an automatic gallery image. They will be displayed with a folder icon instead.
This happens e.g. with galleries that you use for better organization and that do not contain any images themselves, but only sub-galleries.
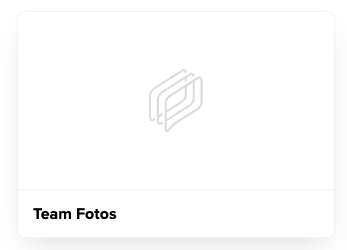
You can set the gallery image yourself for each gallery – this means you overwrite the automatically created gallery image or you replace the folder icon for empty galleries with a better fitting image!
You can change the gallery image in these places:
Click on the three dots at the bottom of the desired image – select “Set as gallery image”, confirm with the green Save button, done!
In the same menu you can also click on “Upload image” and set an image from your computer directly as a gallery image. You don’t have to upload the image to the gallery.
As a gallery image you can use a picture that is not in the gallery itself.

In your gallery overview, click on the three dots at the bottom right of a gallery or next to the gallery name and select “Set gallery image”. You can now upload an image from your hard drive as a gallery image – you don’t have to upload the image to the gallery to do this.
If you want to use an image that is already in the gallery as a gallery image, see the description above at 01.
One more tip:
In the menu with the three dots of the gallery you can also delete an already existing gallery image – then the folder icon will be displayed. If you want to choose another gallery image you can do so as described in the sections 01 and 02 above.
To ensure your gallery image is perfectly cropped for any possible use, we let you set a focus point for your gallery images.
Use the red circle to click and mark the most important part of your image, so your gallery image always shows the desired crop.
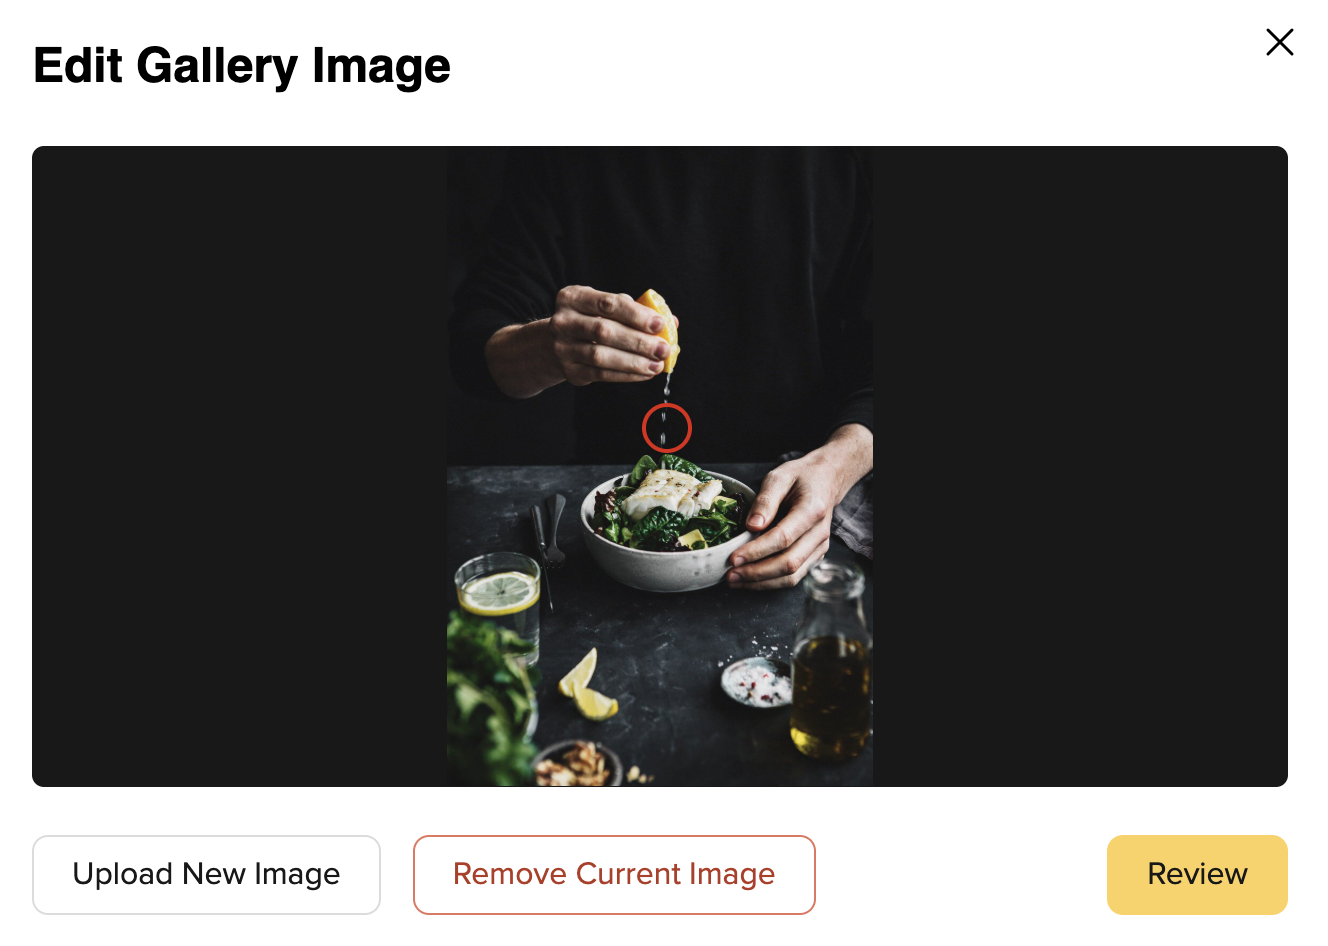
Of course, this does not only work with photos: You can also upload your own designs, lettering, etc. as JPG or PNG and use them as gallery images!

You can easily move or copy files from their current gallery to another gallery in picdrop.
This is a step by step guide on how to do this.
First select the files you want to move or copy. To do so, click on the blue plus sign that appears in the upper left corner of the file when hovering the mouse over it.
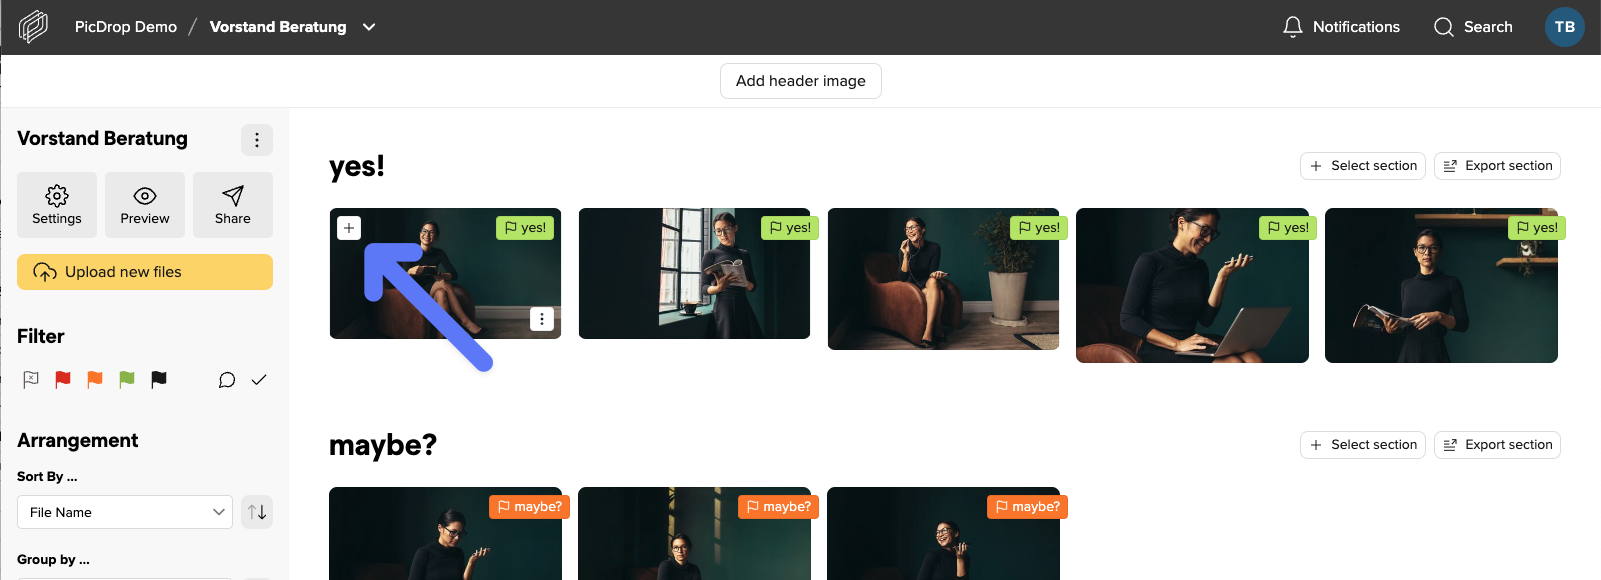
Pro tipp: You can also quickly select any number of files to copy or move from a saved set or any filter set in the filter bar.
When you have selected all files, click on the Move / Copy icon located in the export bar at the bottom of the screen.
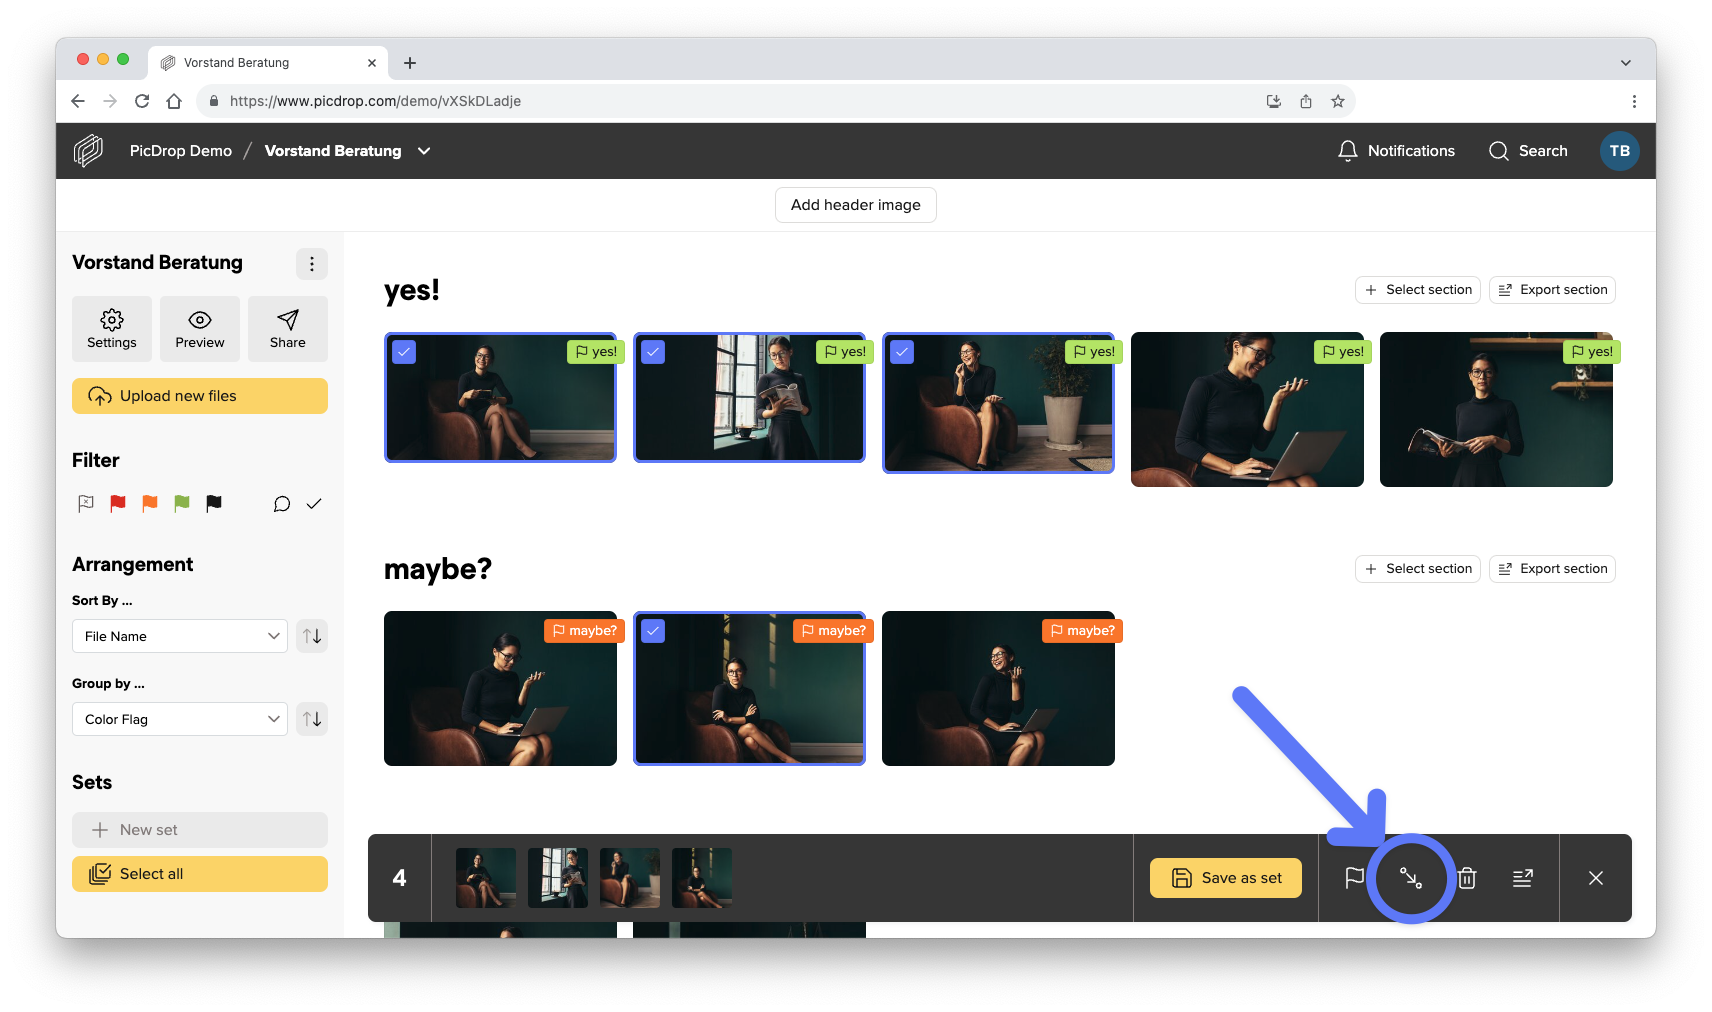
In the opening menu you can now choose whether you want to move or copy the files.
Select the desired target gallery in the list of your galleries or simply create a new gallery in the lower left corner.
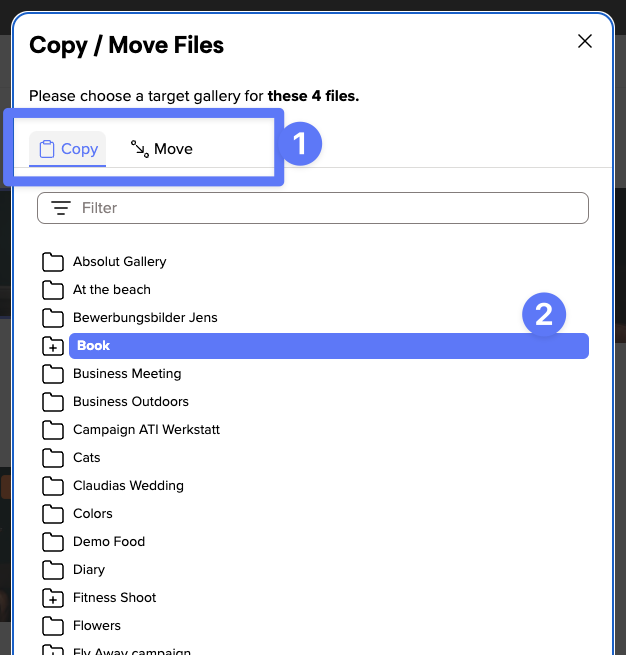
Confirm the selected action with the button at the bottom right.
The success message shows you that all files have been copied or moved.

With a click on the button “Go to target gallery” you will be taken directly to the target gallery.
We have included this feature of analogue photography in picdrop, so that every photographer has the possibility to save a contact sheet of his or her galleries from within picdrop. There, e.g. printed out, notes can also be entered by hand.
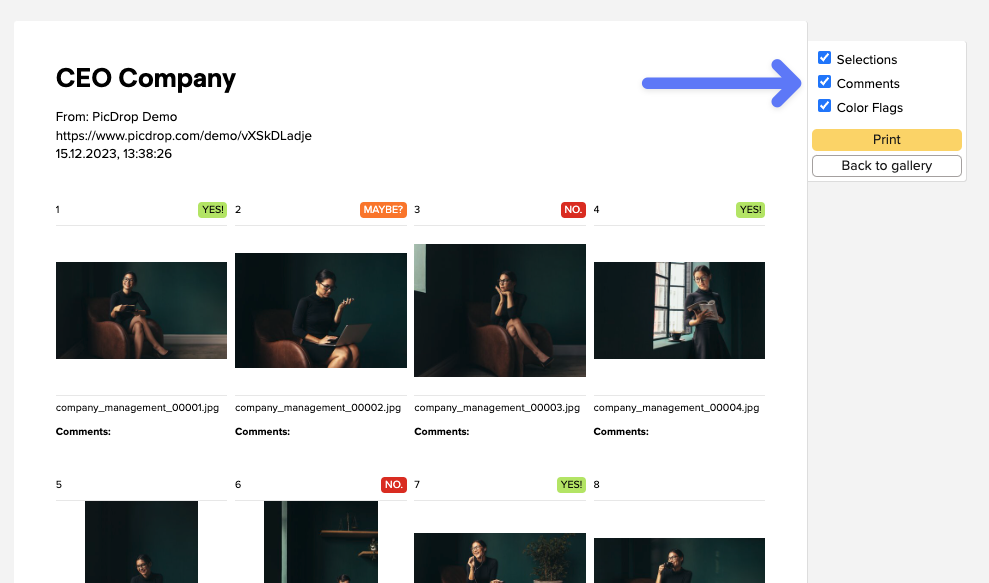
A contact sheet is a great way to compare, evaluate and get an overview of your images – exactly because the images are shown in a small size and all together.
On the contact sheet you have all images of the gallery at a glance and can also choose whether the color markings, comments and selections from picdrop should be directly visible.
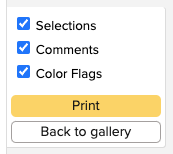
The contact sheet always contains all images of your gallery, as already in analogue times the whole film roll was content of the contact sheet.
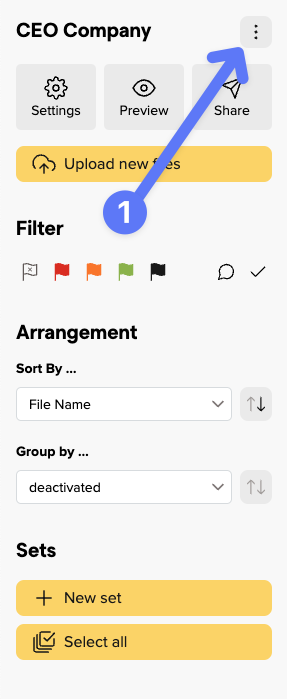
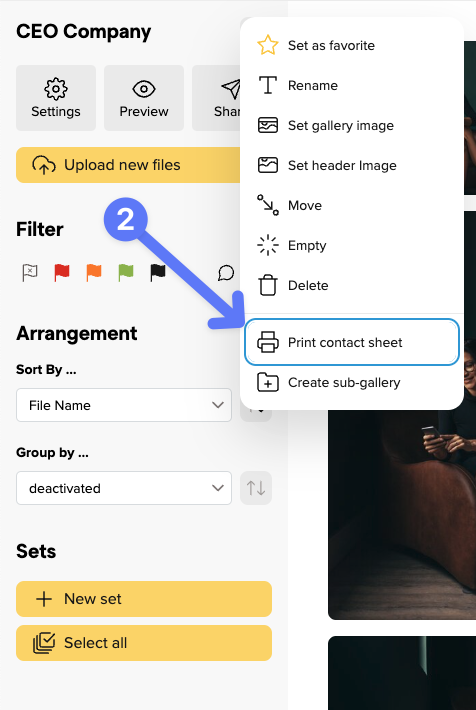
You can create a contact sheet in every gallery by clicking on “print contact sheet” in the gallery menu…
… and then either print it, or save it as PDF with the help of the system dialogue.
You accidentally deleted a whole gallery in your picdrop account?
Don’t panic!
Sometimes there is a chance that you are able to recover them, as we keep deleted galleries for you for a short period of nearly 7 days in the trash bin of your account. If a gallery can be restored you can find it there with a timer to show you how much time you have left for the restore.
The only condition for you to be able to restore the gallery is that you did not create a new gallery with the same name in your account in the meantime.
Simply click the trash bin icon at the bottom of your gallery list in your gallery overview; there, you can restore deleted galleries that are still available to your heart’s content. By the way, deleted galleries in the trash bin don’t count toward your picdrop account’s storage, which is why you can’t empty it.
Please note that you may only restore complete galleries and not individual files.
In case of recovery, your gallery will be restored with all color flags, comments and selections.
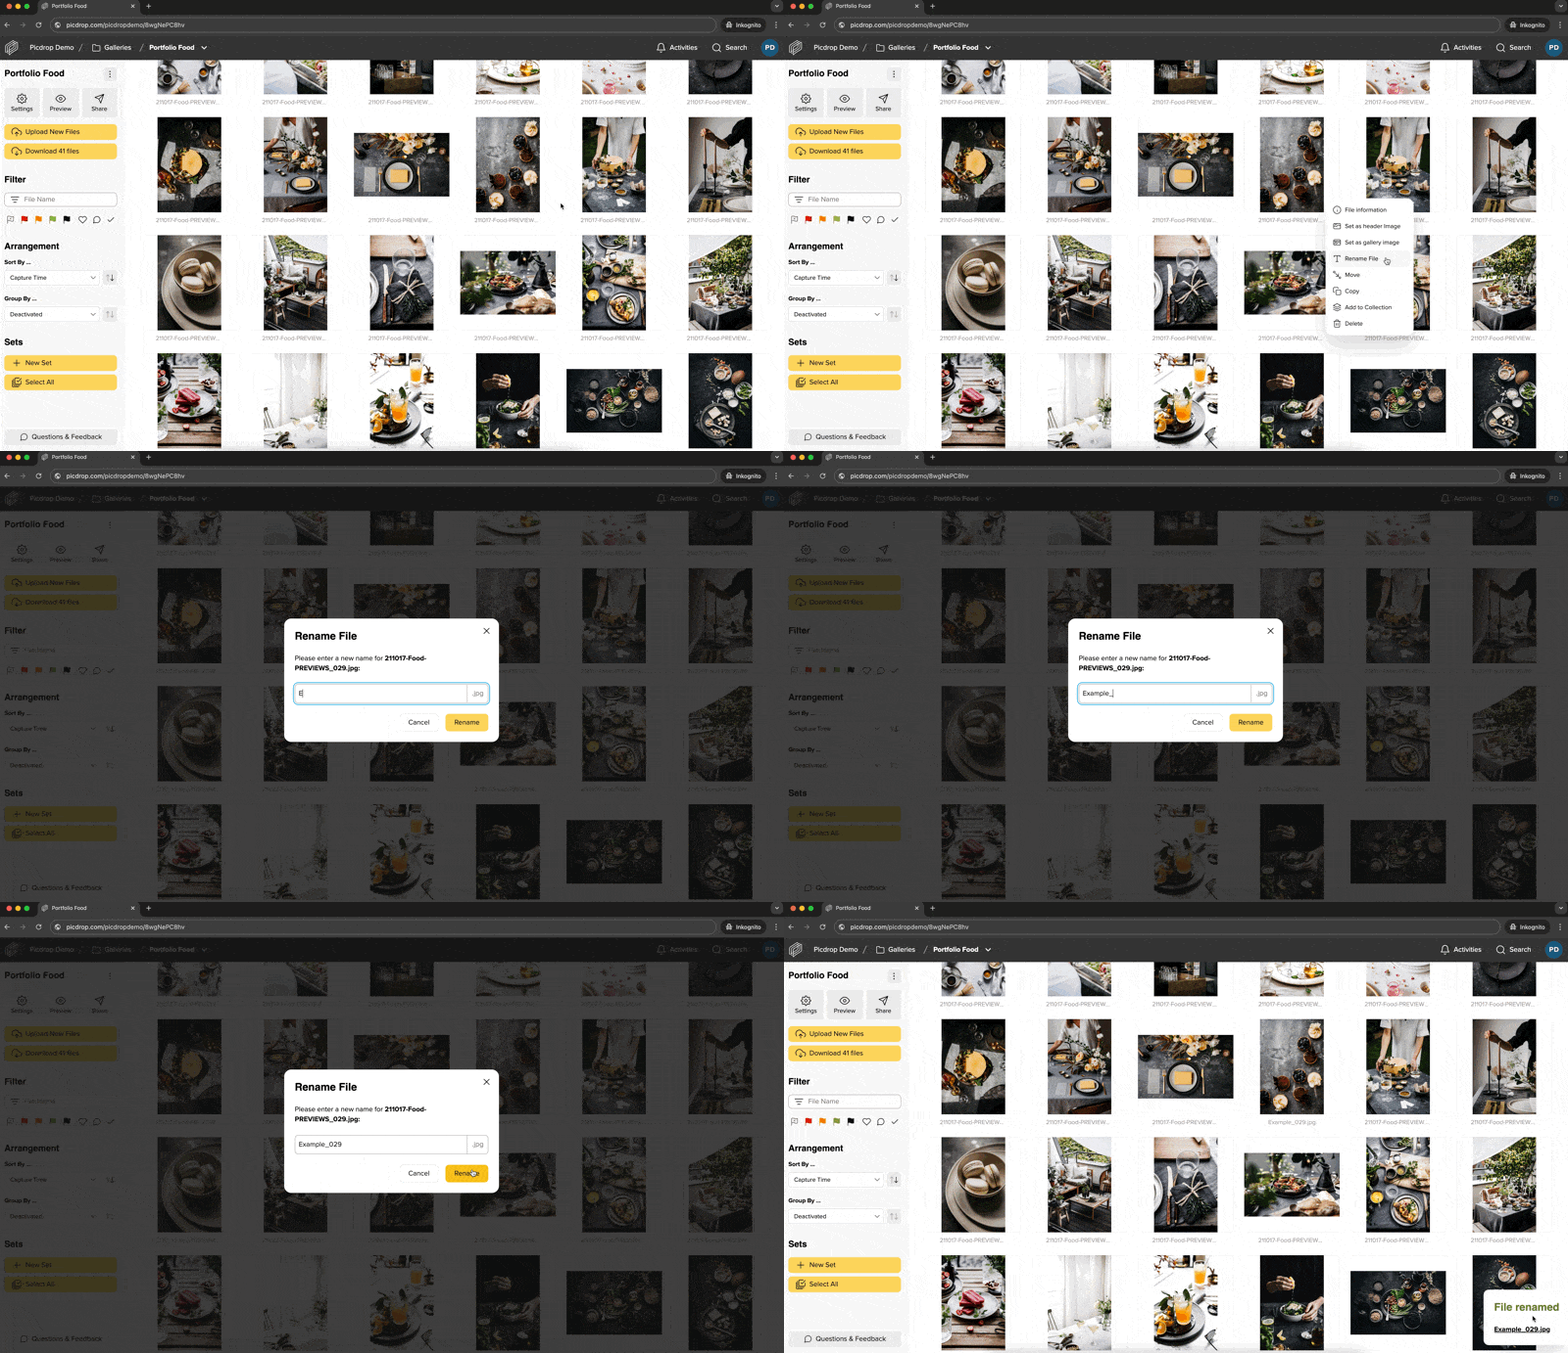
You can rename files in your galleries by hovering your mouse cursor over an image and then clicking on the three-dot menu. There you can conveniently change the name by clicking on “Rename file.” Once you have changed the name, simply click on “Rename” and you’re done!
This is also possible in the three-dot menu in the single image view.
It’s important to note that the filter function within Lightroom and other tools will no longer work if you have changed the file names. Because it is obviously necessary that the file names remain identical to those in your other tool e.g. Lightroom.
You can only use this feature if you purchased a Pro, Advanced, Business or Enterprise plan.
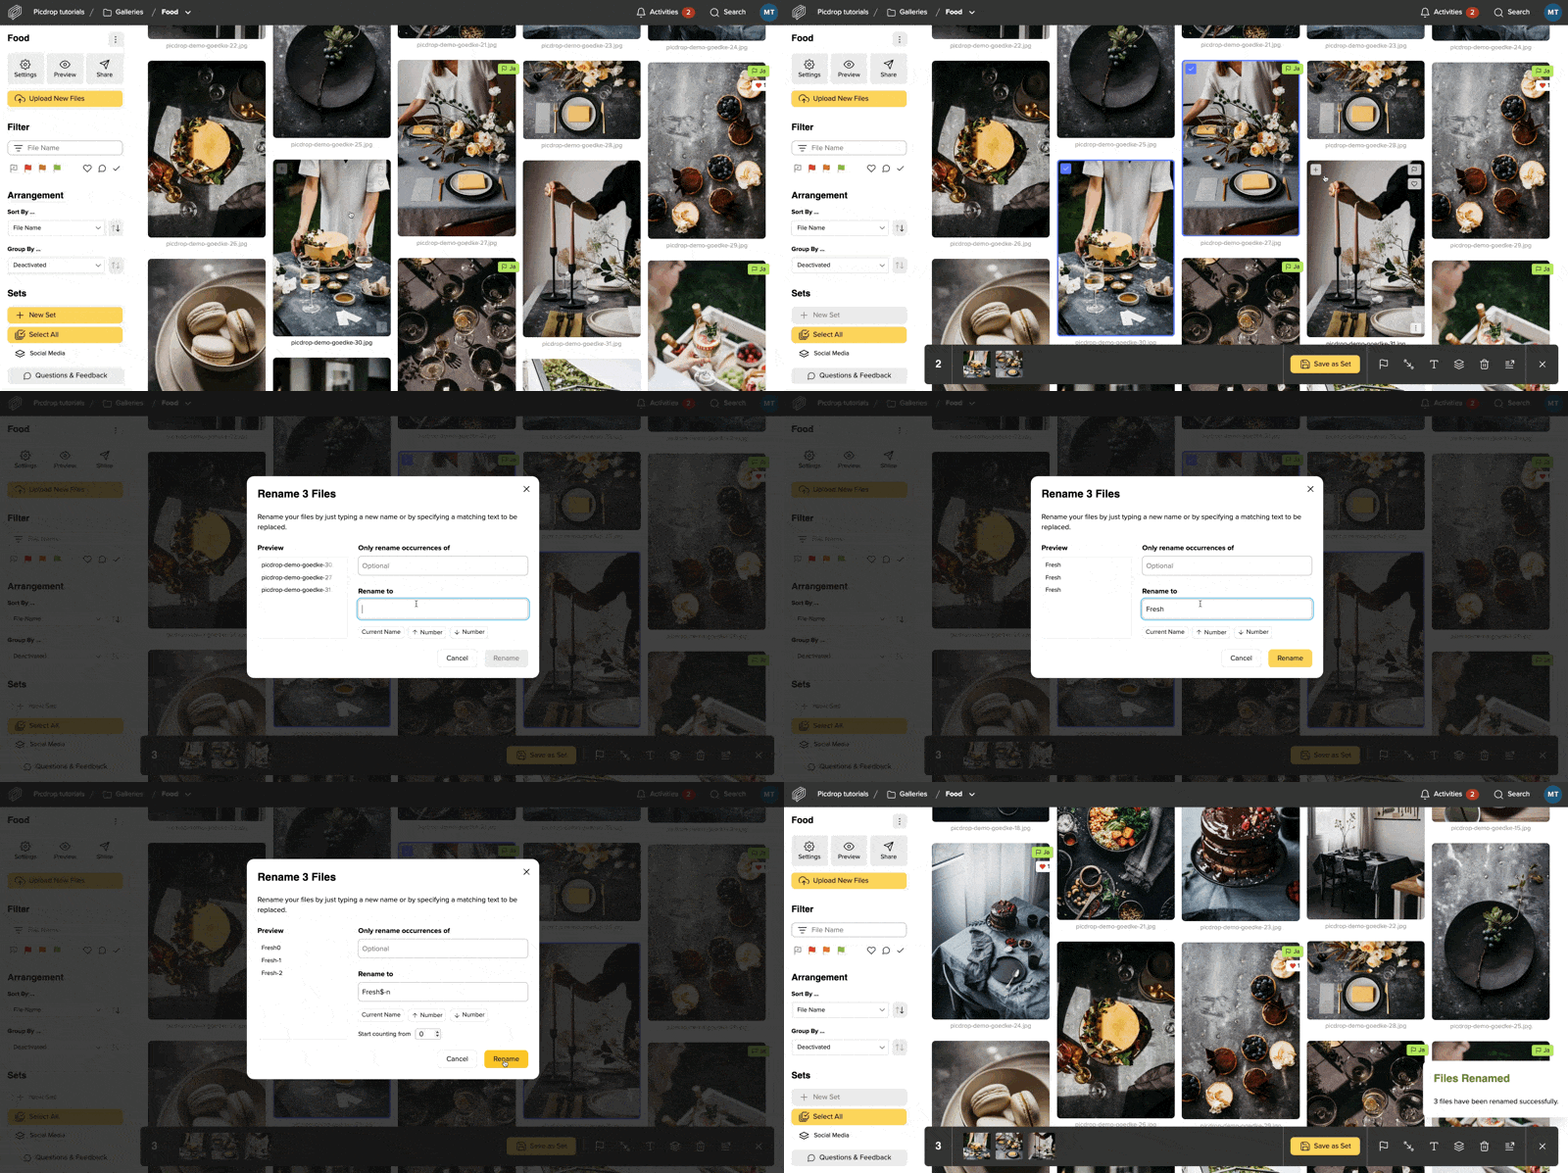
You can also rename multiple files at once. You first select the files you’d like to rename, then pick the rename option in the toolbar. Now you can type in the name and a rename with ongoing numbers for example.
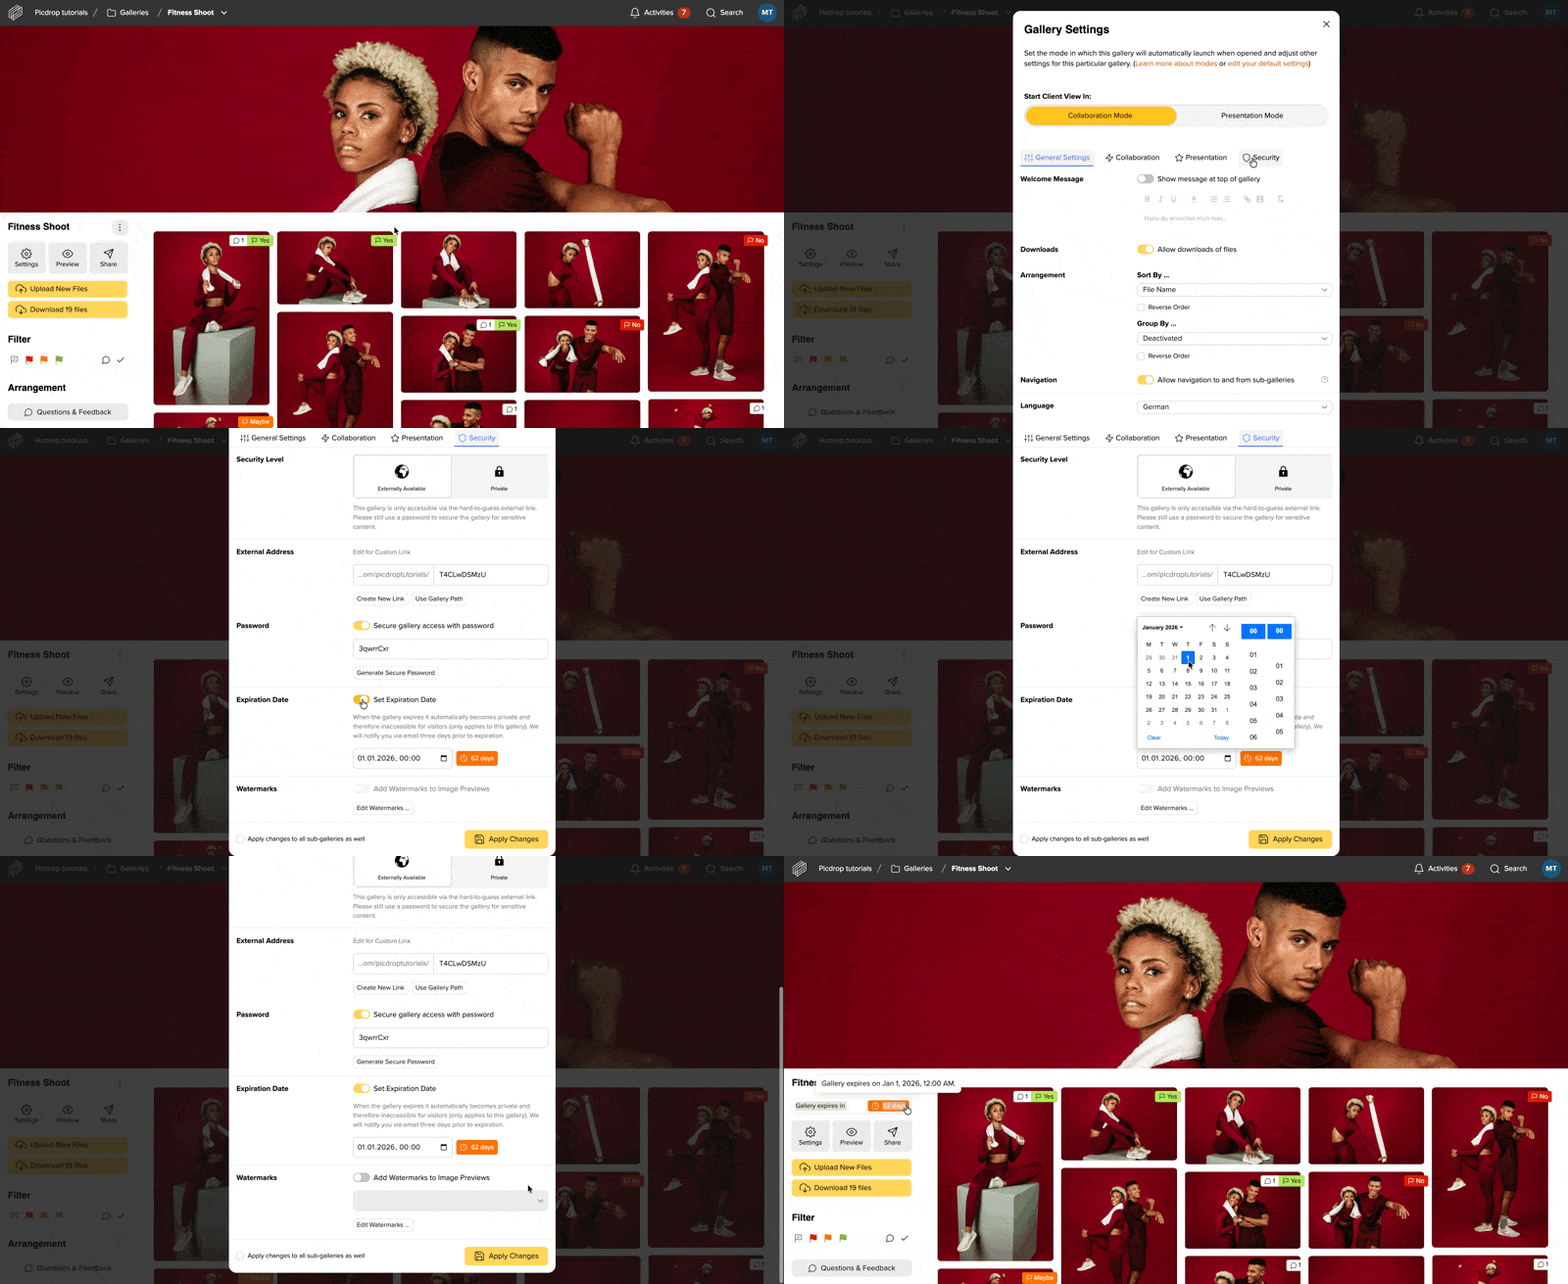
You can make your galleries accessible to your clients for a limited period of time. In the gallery settings, you can define the timeframe during which the gallery is available.
Once this period expires, the gallery is automatically set to private, making it visible only to you and your team members. External visitors will no longer have access. A built-in countdown shows both you and your clients how much time is left.
Additionally, you’ll receive an email notification three days before the gallery expires.
If your client should need access to an expired gallery, you can either set it from “Private” to “Externally available” or create a new expiration date to make it accessible again.
The expiration date feature is available starting from the Pro plan.
With the @Mentions feature, you can tag other people directly in a comment to quickly notify them about important notes, questions, or approvals. The @Mentions feature is available in all of our plans – with no limitations. Whether you’re working solo or in a team, you can tag people at any time and include them directly in your feedback and review process.
How does it work?
Simply type @ inside a comment. You can then:
What is it useful for?
What happens after someone is mentioned?
The tagged person receives:
If you upload complete folder structures to your picdrop galleries, the existing structure including all subfolders will remain fully intact and will be transferred to picdrop without any changes.
To do this, first open any gallery. Then click “Upload new files” → “Upload folder”.
Alternatively, you can drag and drop your folders directly into the gallery.
The entire folder structure will be preserved exactly as it is.
The current limit for uploading folder structures to picdrop is 500 folders with a total of 20,000 files.
The folder upload is freely useable on desktop devices, but not currently on all mobile versions of picdrop and not for iPadOS, which is due to browser-restrictions of the respective device.
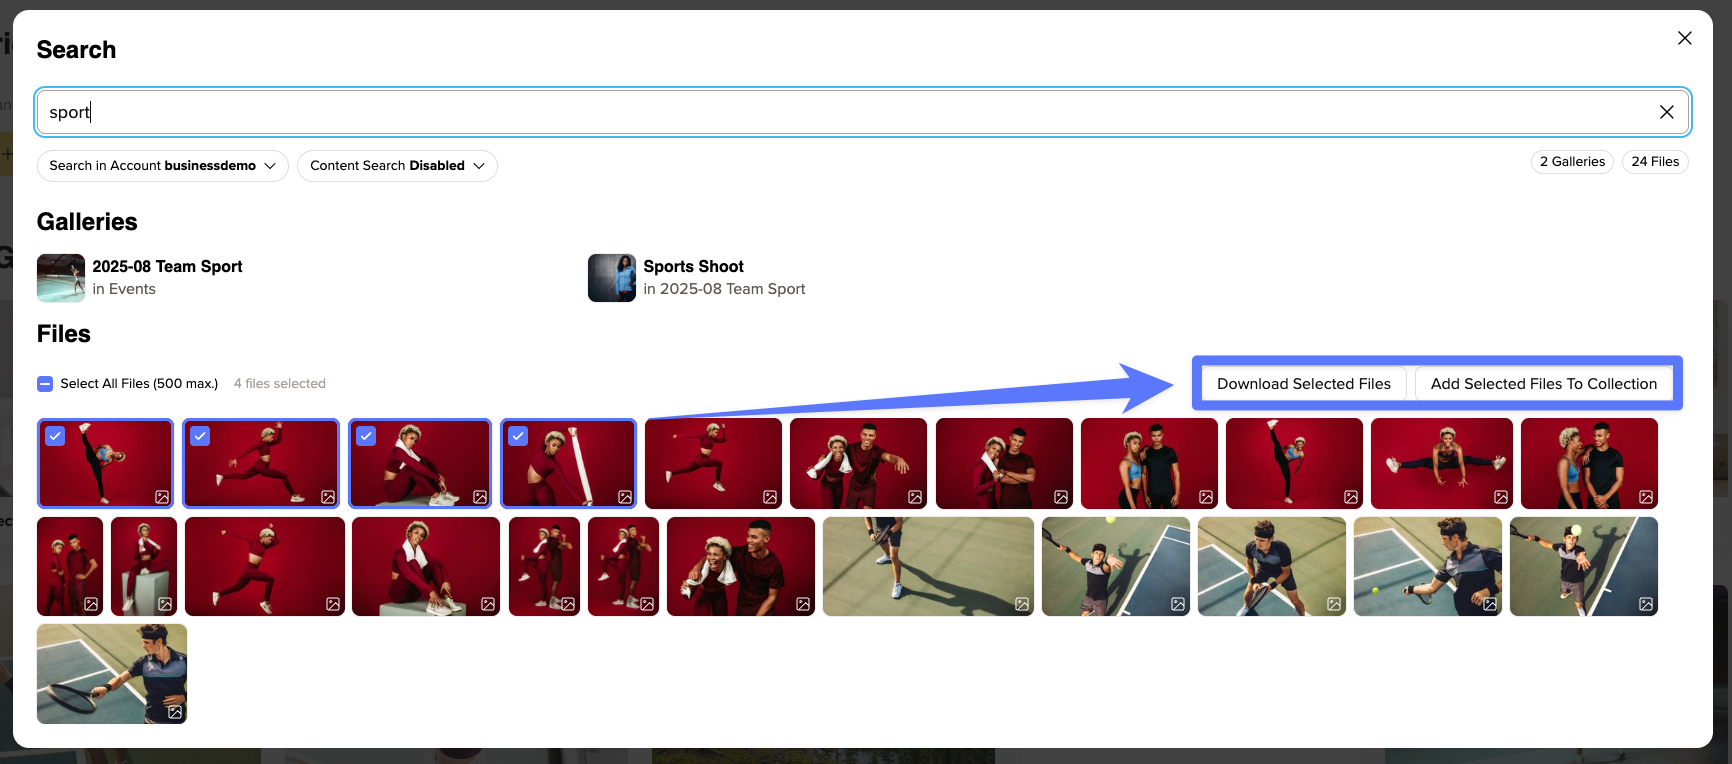
With the search function, you can easily find images from different galleries. Once you have found several suitable images, you can download them together or add them to a collection – even if they are located in different galleries.
How do I select images in the search?
Open the search in your picdrop account and search for the images you would like to find. You can then select individual images or select all images. Using the bar on the right, you can either download the selected images together or add them to a collection.
Please note that only files can be selected – galleries themselves cannot be selected.
Download selected images
Click “Download” to download all selected images in a ZIP file. The images can come from different galleries.
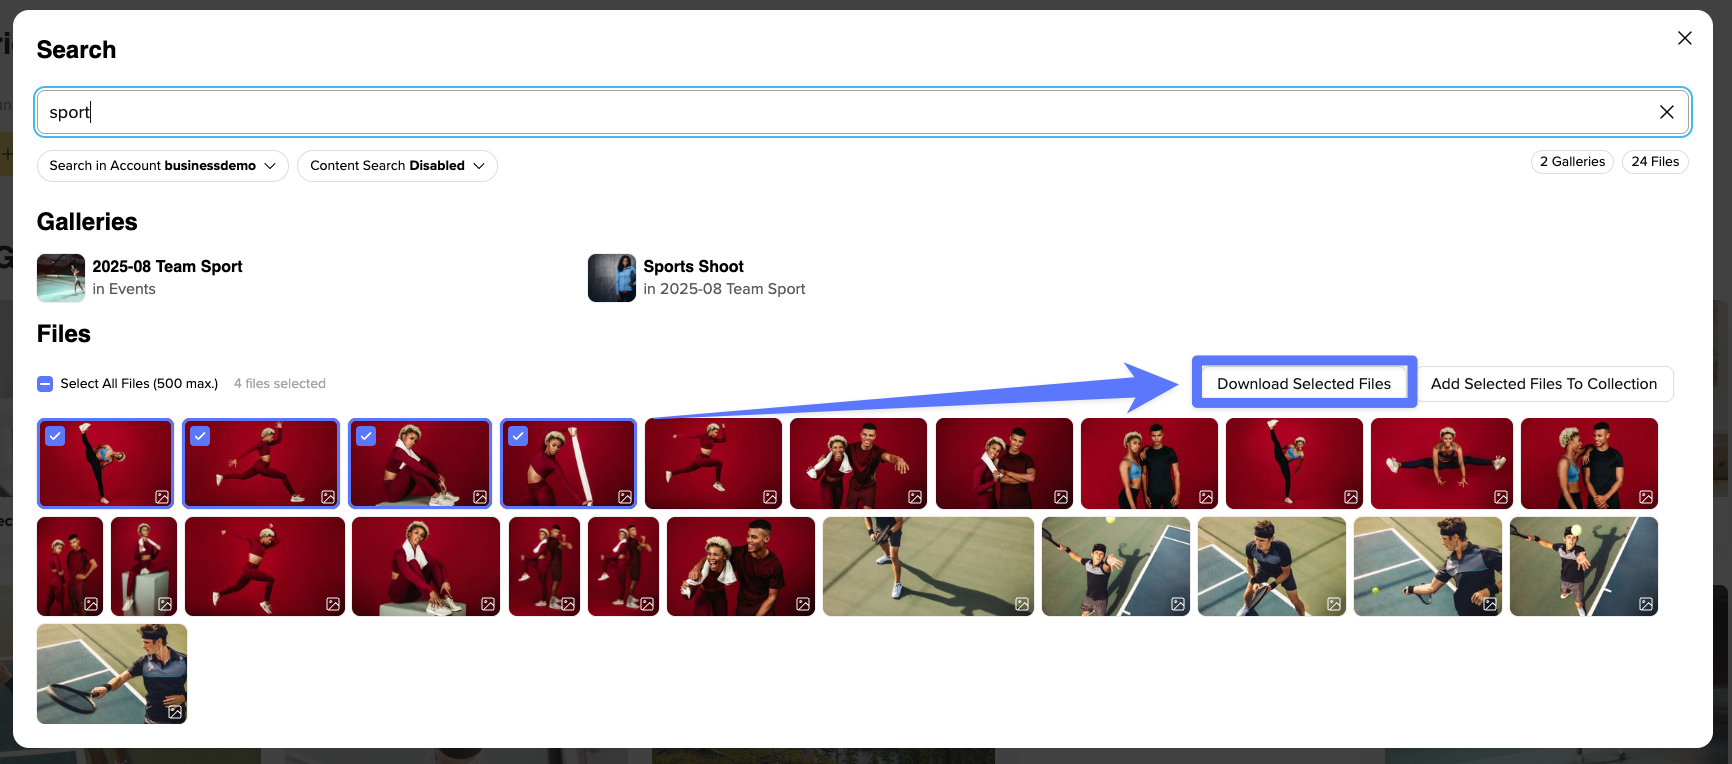
Whether an image can be downloaded depends on the settings of the respective gallery:
You can still select unavailable images, for example images from locked galleries. Before downloading, you will see how many of them will not be included in the ZIP file. If none of the selected images can be downloaded, the download button will be disabled.
Add selected images to a collection
Would you like to collect the images you have found in one place? You can add them directly from the search to an existing or new collection.
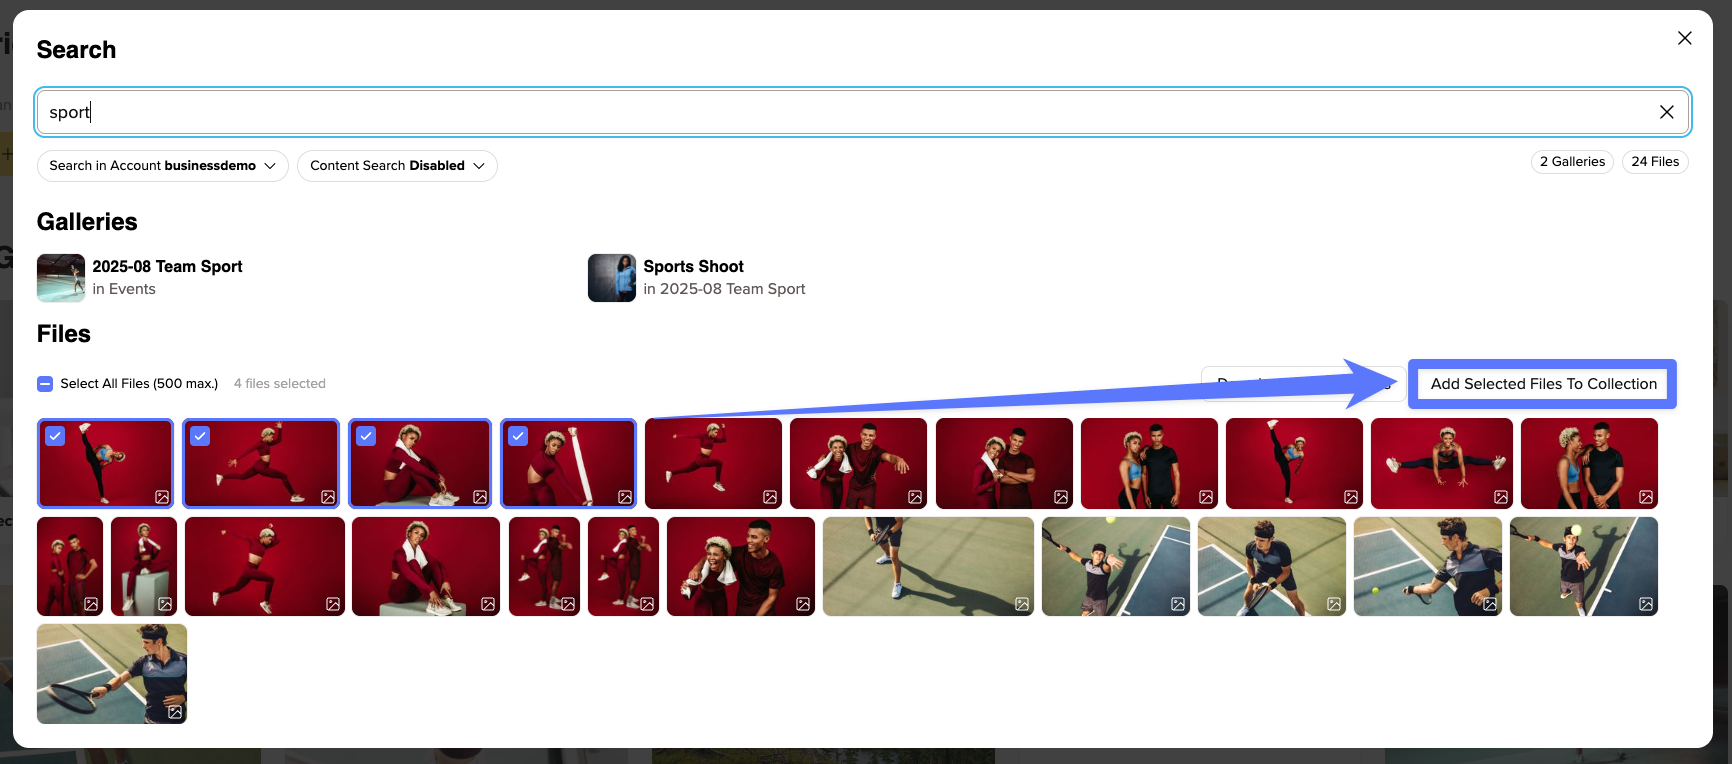
As the account owner, you can add images to your collections at any time. Team members need write access to the respective gallery as well as access to all collections. If this permission is missing, the option will not be displayed.
Images from locked galleries cannot be added to a collection.
What else should I keep in mind?
You can select up to 500 images at a time – both for downloading and for adding them to a collection.
By selecting “Select all”, only the search results that have already been loaded will be selected. If you would like to select further results, scroll down first to load them.
Once you close the search, your selection will be reset.
Please also note that downloads made through the search will not appear in your accounts activities.