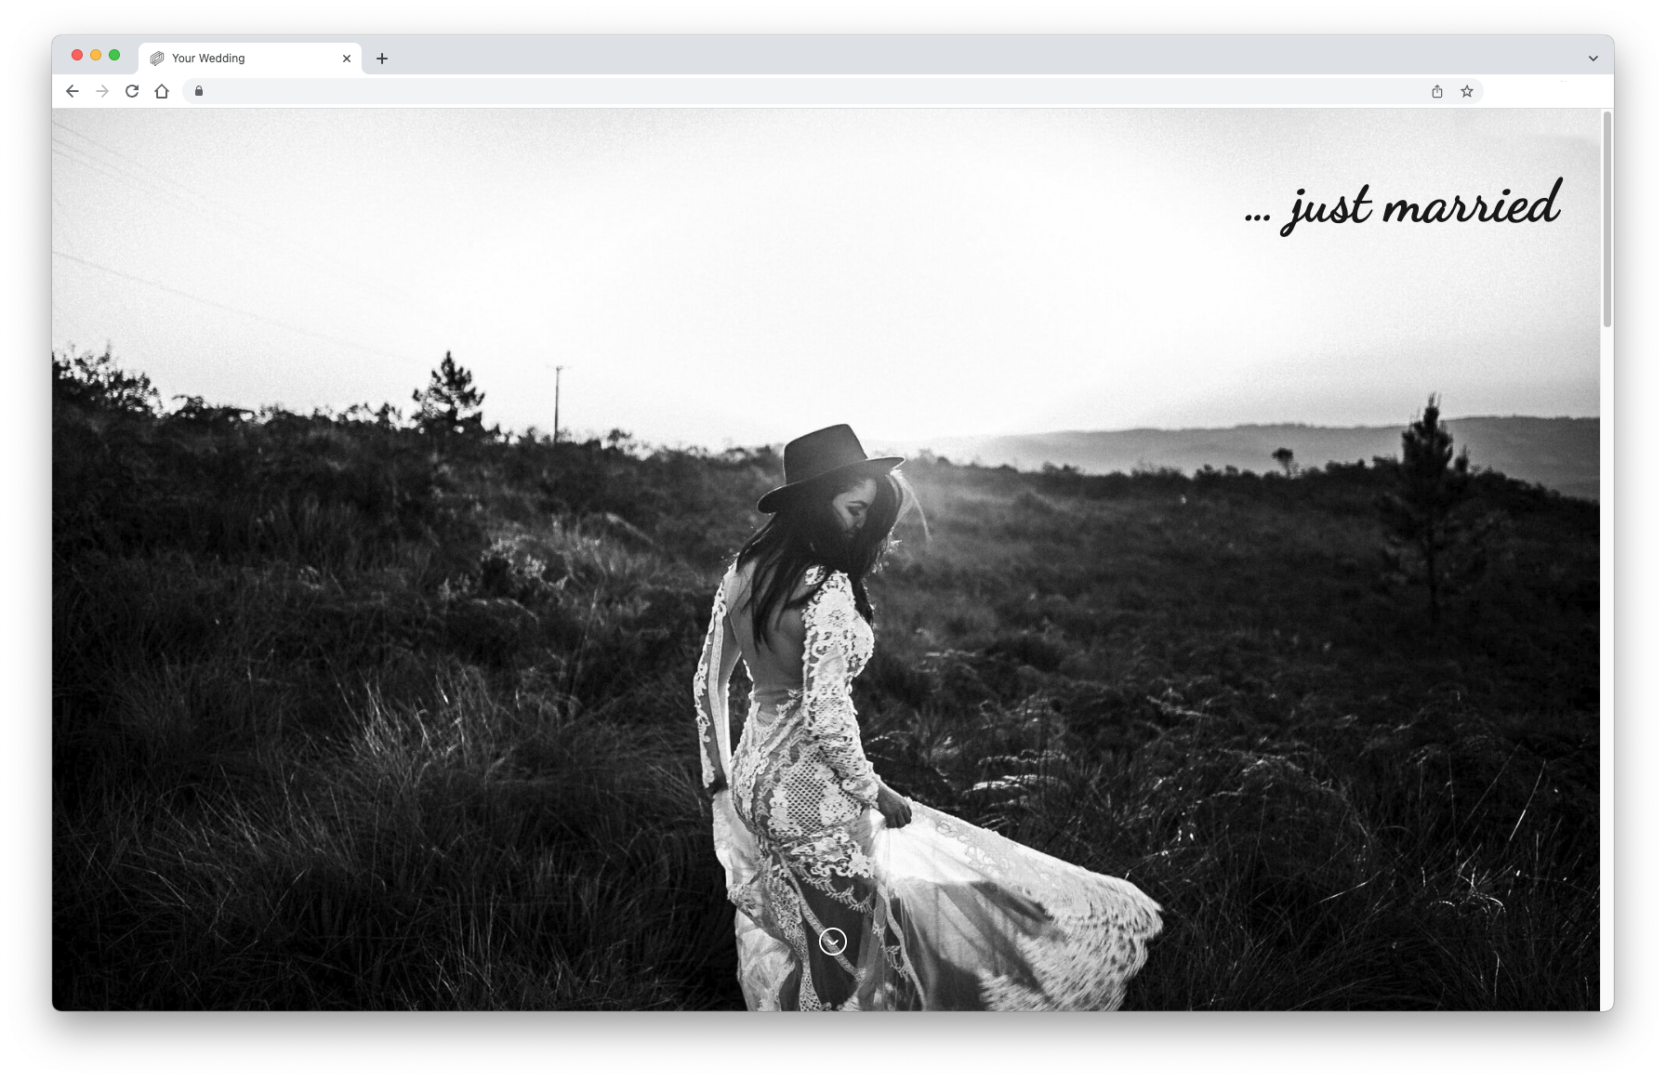
Every gallery you create in picdrop can have a header image. The header image is the first thing you and your gallery visitors see at the top. In Collaboration Mode the header image is displayed in a narrow landscape format across the entire width. If your gallery starts in Presentation Mode, the header image is displayed as an opener across the entire browser window.
No - unlike the gallery image, which we automatically create for you as soon as you upload images to a gallery, the header image for a gallery is not set automatically. So you are free to decide if you want your galleries to have a header image and which image you want to use for it.
For each gallery you can set the header image in several ways. You can choose a header image that is already uploaded to the gallery. You can also upload an image directly from your hard drive, without it having to be in the gallery.
You can change the header image in these places:
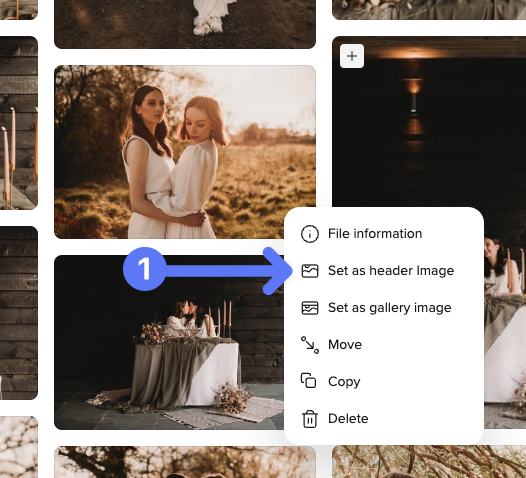
Click on the three dots on the desired image and select "Set as header image" from the menu. In the next step, set the focus point for the header image. Confirm everything with the yellow "Done" button and the header image will be displayed in the gallery.
Alternatively, you can simply drag and drop the image into the header image bar at the top of the gallery.
Then just click the gray "Add header image" button at the very top of the gallery.

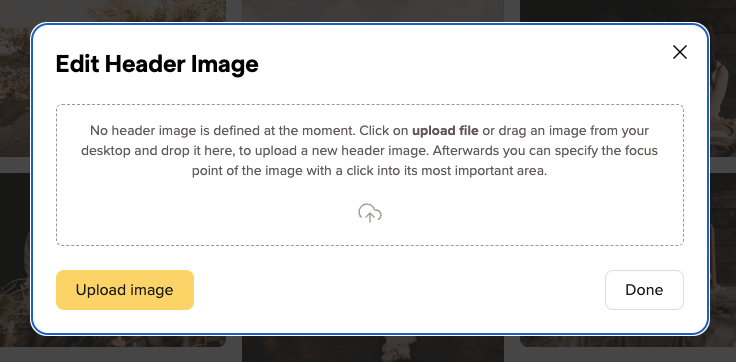
The dialog for changing the header image will open. You can then drag an image from your computer directly into the dialog or select it from your hard drive using the "Upload image" button.
If you want it to be even faster, you can also drag and drop the image from your computer directly onto the header image bar to open the menu.
First, a brief explanation:
We display the header image in a wide variety of places in very different aspect rartios.
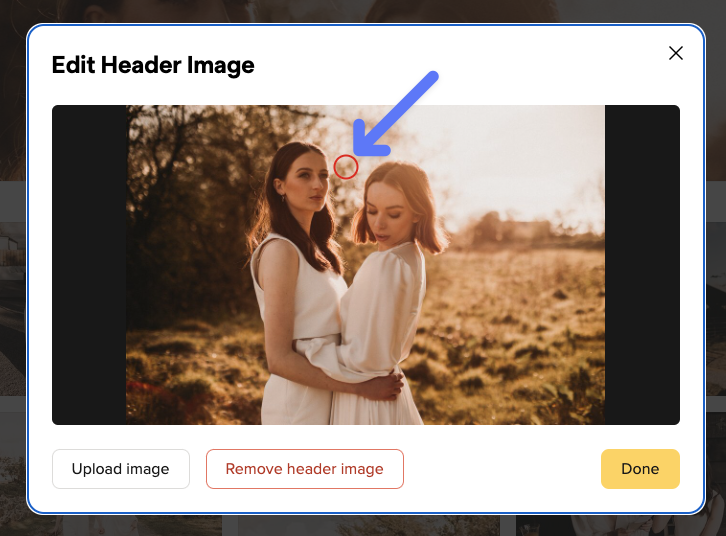
To make sure your header image is perfectly tailored for every possible use, you can to set a focus point for your header images. With the focus point you mark the most important part of your image and picdrop automatically creates the right header image for all screen sizes. This is how it works:
With the red circle you click on the most important part of your image that should always be displayed – no matter with which crop and which aspect ratio we display the header image in a gallery.
Tip for choosing the header image:
The best photos to use as header images are those that have a clear main subject, ideally set against a relatively calm background. This way, the title of the gallery also has enough space when you set up the gallery in Presentation Mode.
We recommend that you use the highest resolution possible. With 4000px or more in width we have enough resolution for all possible crops of the header image and can display it perfectly - no matter if on a smartphone, tablet or a 4k display.
The Presentation Mode is a view trimmed to a pure and beautiful presentation of your work. It is perfect for images and videos of weddings, events and other special occasions.
You can give your customers the ability to hide individual files in Presentation Mode.
In the gallery settings, please activate the functions "Allow switch to Collaboration Mode" and "Do not show red flagged files in Presentation Mode".
When visiting the gallery, your customers can now switch from Presentation Mode to Collaboration Mode by clicking the button at the top. Adding the red color flag to a file in Collaboration Mode will automatically hide those images Presentation Mode.
If you want, you can change the name of the red color flag, e.g. to "hide", so that it is even clearer for your customers what adding the color flag will do.
In each gallery you will find a switch in the Gallery Settings to activate the Presentation Mode.
To activate Presentation Mode, activate the switch for Presentation Mode at the top by clicking on the title.
Your gallery will automatically start in Presentation Mode for all visitors of the link. You can see the Presentation Mode yourself by clicking on the button Preview in the upper left corner in your gallery. Or you can open the link to the gallery in a private browser window where you are not logged in to your picdrop account.
Please take a look at our tutorial about presentation mode for further input.
After you have activated the Presentation Mode in the Gallery Settings, the gallery looks the same as before. To test the new view, click on "Preview" under the name of your gallery on the left side of the screen. There the gallery will appear exactly as your client will see it when opening the gallery.
The Presentation Mode is best suited for sharing your images and videos from weddings, events and all other moments where you need a perfect first impression and an impressive presentation of your work.
For each gallery in Presentation Mode you can choose how the thumbnails of your images and videos should be presented.
Open the gallery settings, click on the tab Presentation Mode and activate it at the top with the respective check mark.
Scroll all the way down and you will find the settings for the image previews:
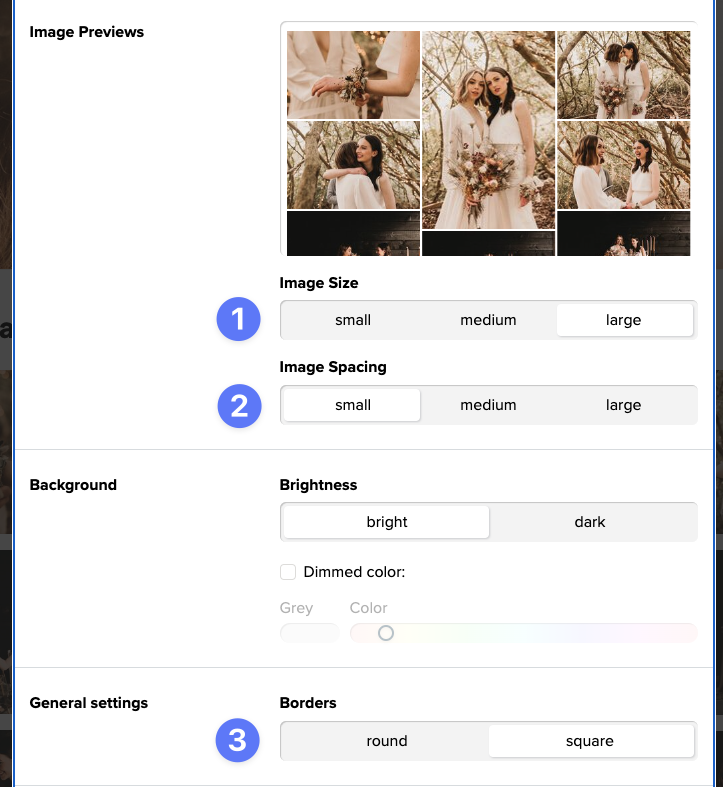
Here you can
You can see all changes live in the preview next to the settings.
At the end, don't forget to save your changes by clicking the "Apply Changes" button at the bottom!
A tip: with a click on preview at the top of the gallery you can immediately see how the gallery will look like for your clients once they first open it!
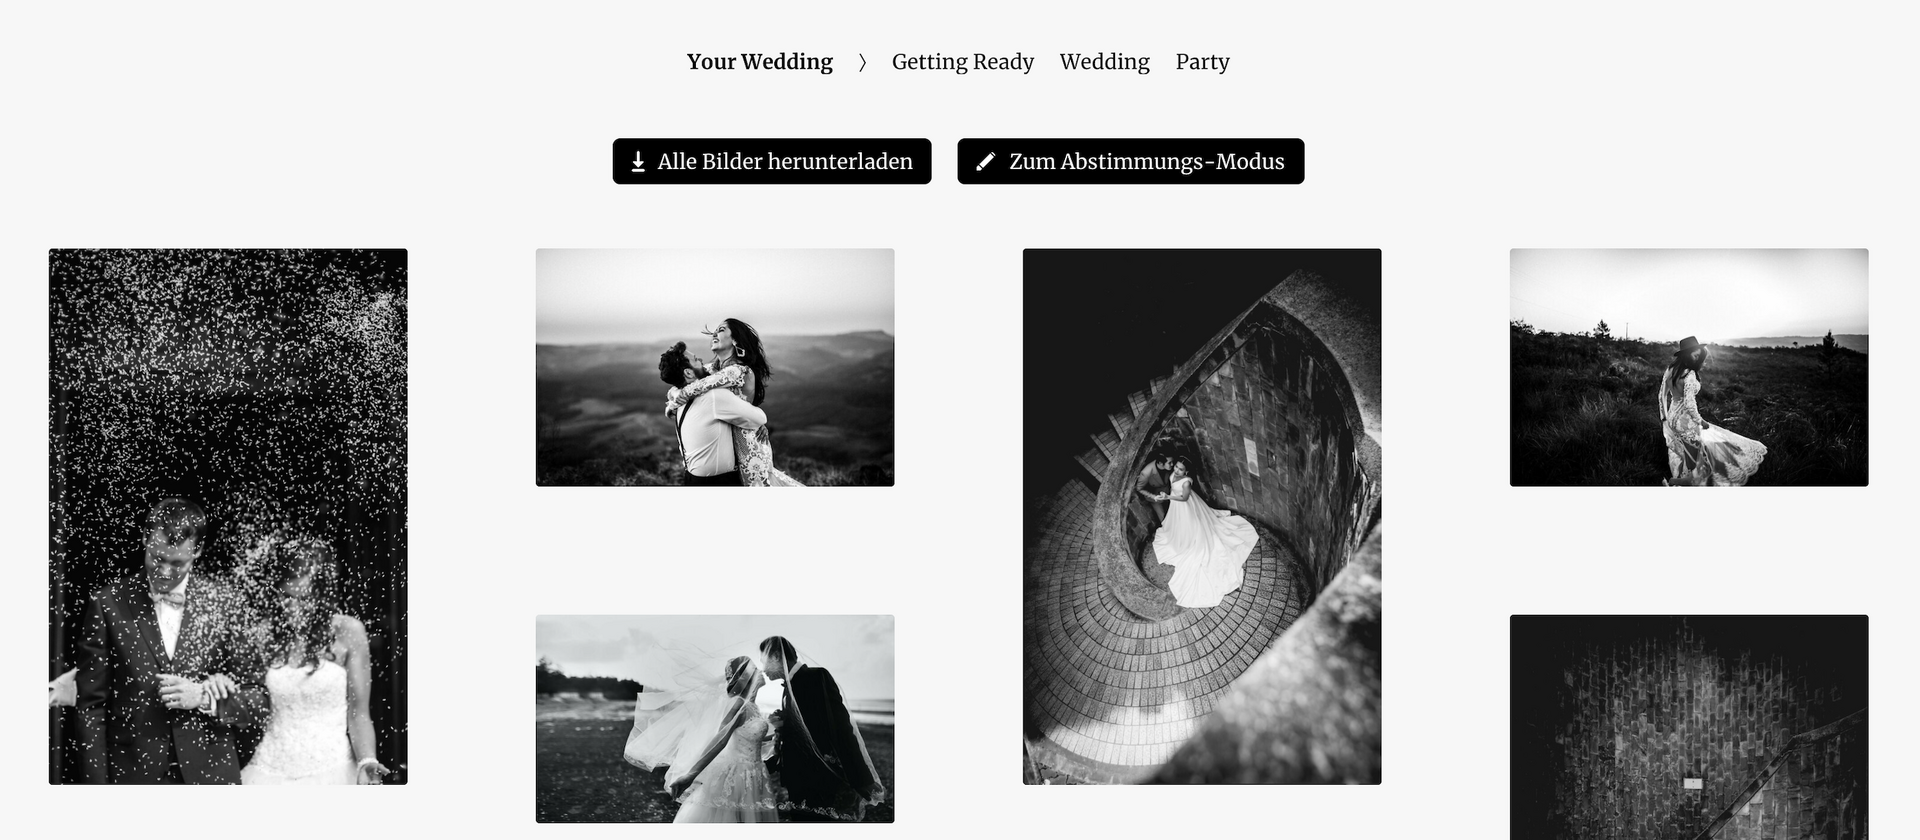
The Presentation Mode is used for pure presentation and download of your pictures.
If you want to give your clients more functions, you can activate the "Allow switch to collaboration mode" function in your "Gallery Settings".
If this point is active, your clients can switch to the usual mode by clicking a button on the top right corner of their gallery.
Entering the collaboration mode they will find all the practical functions of picdrop.
All gallery settings you've set will apply here.
With just one click, your clients can return to the presentation mode at any time if they wish to do so.
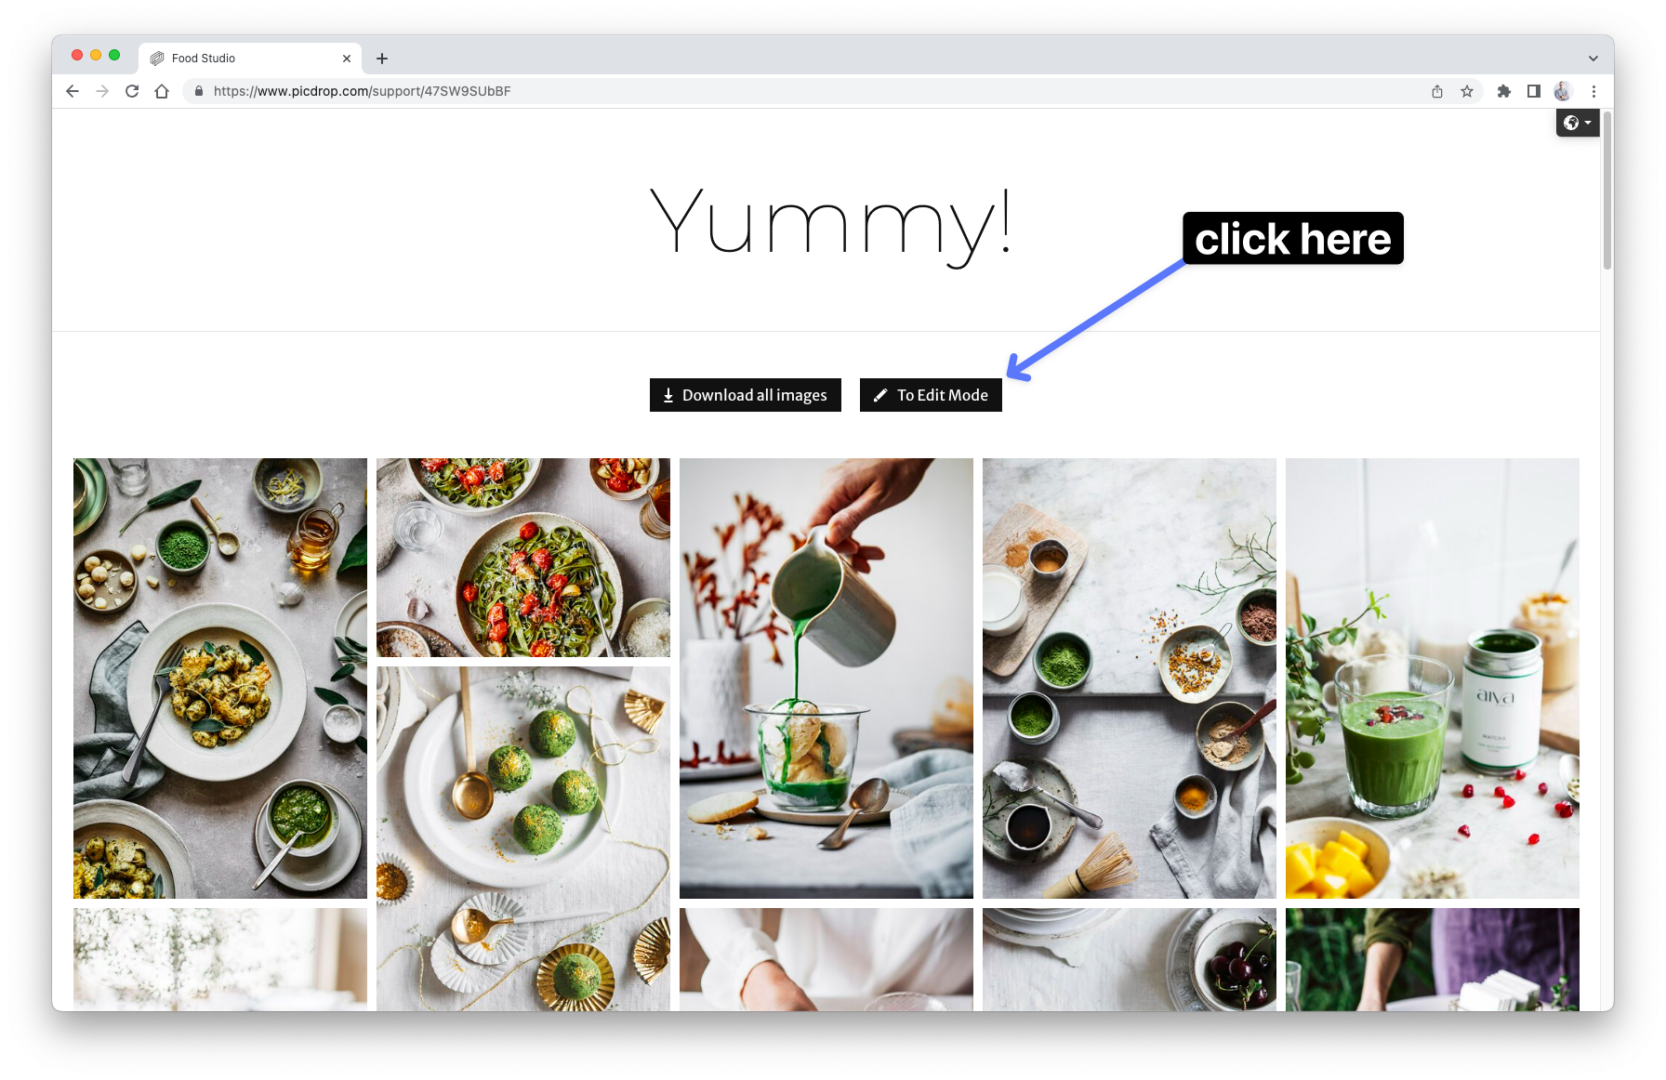
Your gallery is beautifully trimmed in the Presentation Mode.
The range of functions is reduced to the most necessary to avoid distraction from the most important things: your images & videos.
What remains is a pure, beautiful gallery view without annoying sidebar. With an impressive, large header image, larger preview images, horizontal navigation, large gallery title, individually colored image view and so on.
Only the download function is usable if you have enabled it in the Gallery Settings.
picdrop allows you to customize all the details of your galleries to best suit you and your clients.
With the following settings you can create your personal gallery look:
✅ select a font
✅ adjust the position and size of the gallery title
✅ set the brightness for the gallery title
✅ an alternative title for your gallery
✅ a suitable "Open gallery" button

✅ the background color of the gallery
✅ the size of the thumbnails
✅ the spacing of the thumbnails
✅ the choice between a round or square look
All buttons in the gallery adjust automatically to your color and font selection.
You can set the background color for your galleries individually for each gallery. To do this, go to the Gallery Settings and open the Presentation Mode tab.
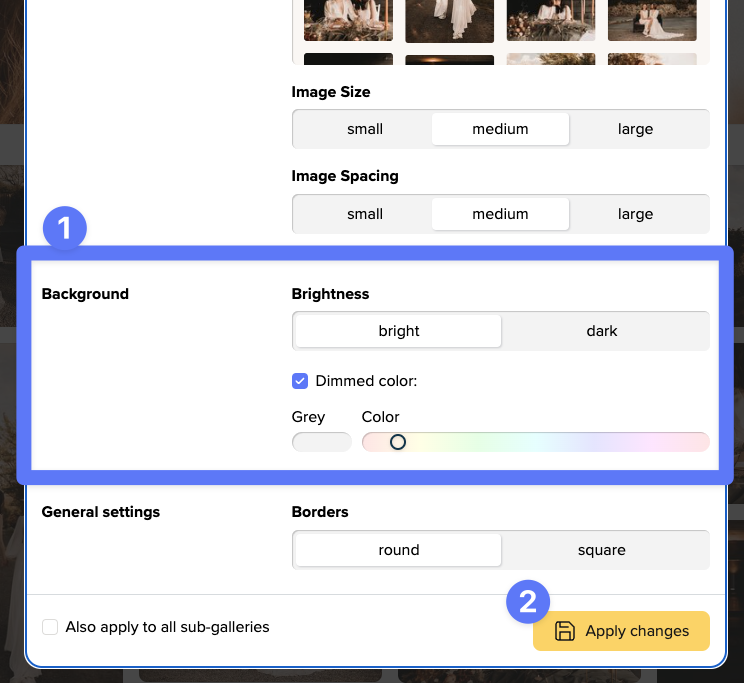
First you decide on the brightness - bright or dark.
If you activate the "Dimmed color" option, you can use the button on the left to choose a grey background. Depending on your choice of brightness, this will be a light or a dark grey.
With the slider to the right you can choose a light coloring for your background.
If you don't activate the "Dimmed color", the background of your gallery is simply white or black.
In the small preview below you can directly see the color effect in combination with your images and videos.
At the end you save your desired color at the bottom with the button "Apply Changes".
This way you're sure to find the perfect background that makes your work look best!
For each gallery you can customize how the title should look like.
First, you activate a header image for your gallery. Here is a detailed instruction on how to set a header image.
Then open the gallery settings, click on the tab Presentation Mode and activate it.
Then scroll down a bit in the gallery settings and you will find the settings for the opener:
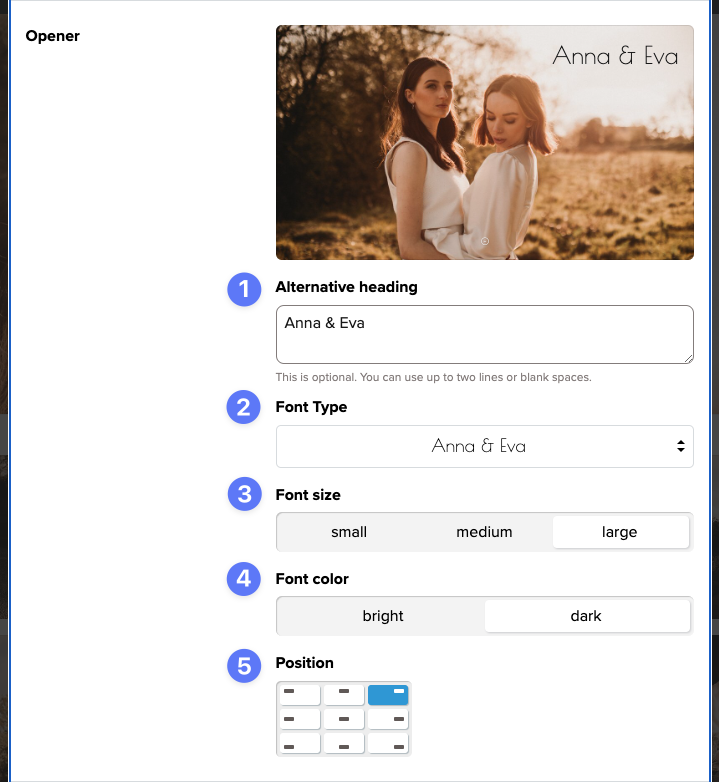
Here you can
You can see all changes live on the small preview image.
All these functions enable you to find the right look for each and every client - from wedding to interior design shoots.
At the end, don't forget to save your changes by clicking the "Apply Changes" button at the bottom!
A tip: with one click on preview at the top left of the gallery, you can immediately see how the gallery will look for your clients when they first open it!