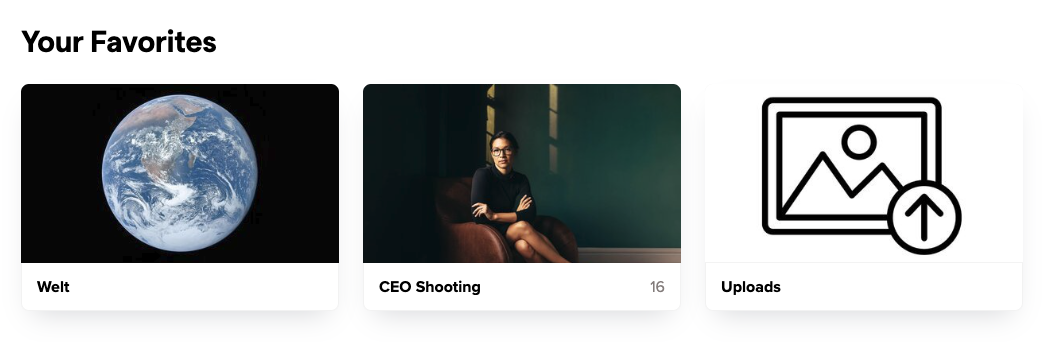
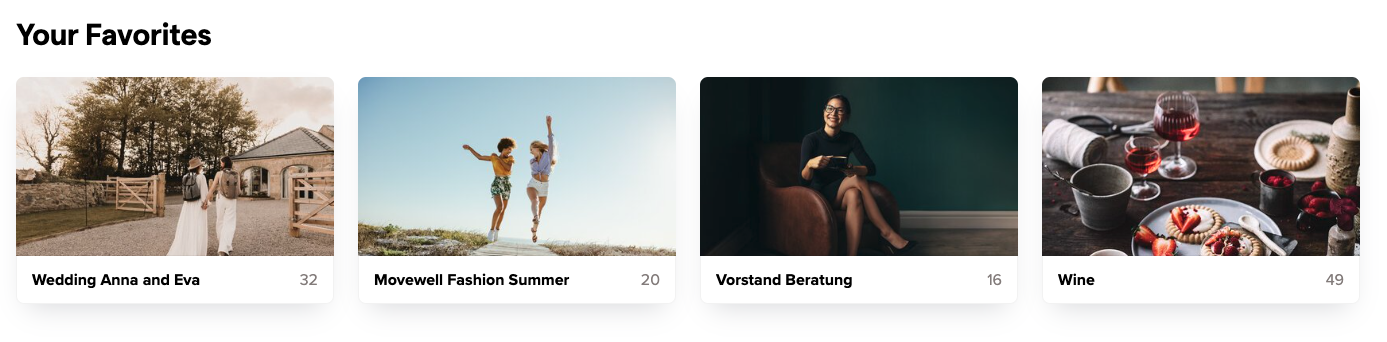
What are gallery images?
Each gallery you create in picdrop can have a gallery image.
You see the gallery image as an icon for the gallery – just like a cover page.
Where are gallery images displayed? Who can see them?
You are logged in as admin in your picdrop account.
Then you can see the gallery images here:
- for each gallery in your gallery overview
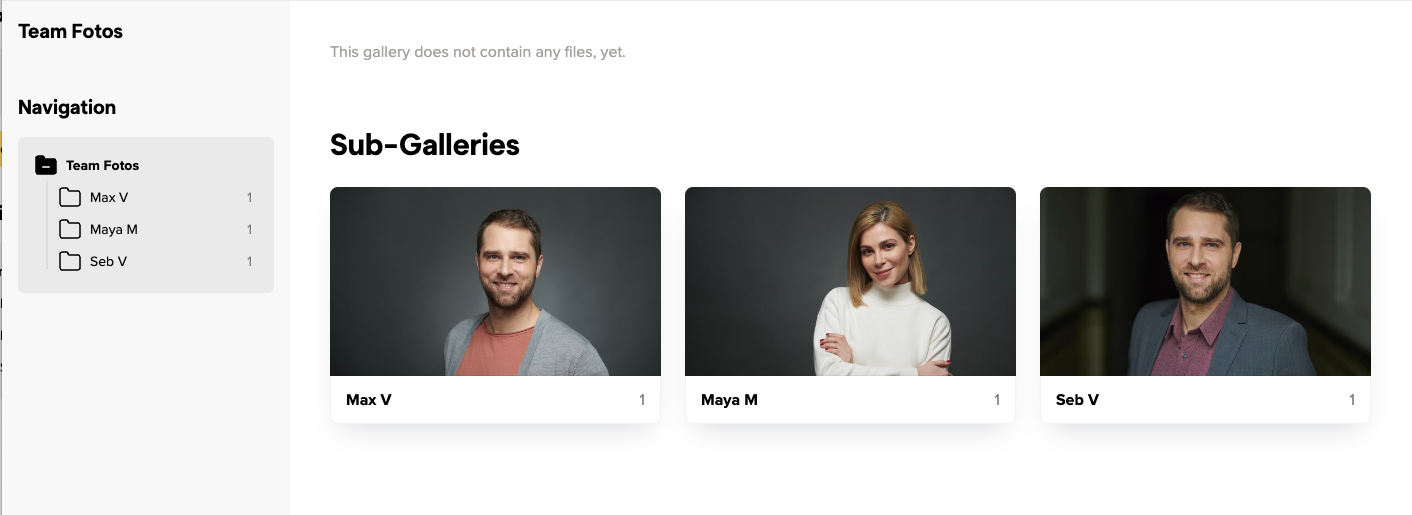
- for all sub-galleries within a gallery
In a gallery that contains subgalleries, visitors will see the gallery images for those subgalleries.
It looks like this for your customers:
Do you work with client logins?
Then your customers will also see the gallery images in their personal gallery overview after they have entered their access code.
How is the gallery image set automatically?
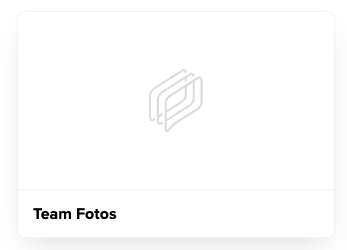
We always take the first image loaded into the gallery and automatically set it as the gallery image for you.
Galleries that do not contain images therefore do not get an automatic gallery image. They will be displayed with a folder icon instead.
This happens e.g. with galleries that you use for better organization and that do not contain any images themselves, but only sub-galleries.
How can I change the gallery image?
You can set the gallery image yourself for each gallery – this means you overwrite the automatically created gallery image or you replace the folder icon for empty galleries with a better fitting image!
You can change the gallery image in these places:
01 – Directly in the gallery
Click on the three dots at the bottom of the desired image – select “Set as gallery image”, confirm with the green Save button, done!
In the same menu you can also click on “Upload image” and set an image from your computer directly as a gallery image. You don’t have to upload the image to the gallery.
As a gallery image you can use a picture that is not in the gallery itself.

02 – In the gallery overview
In your gallery overview, click on the three dots at the bottom right of a gallery or next to the gallery name and select “Set gallery image”. You can now upload an image from your hard drive as a gallery image – you don’t have to upload the image to the gallery to do this.
If you want to use an image that is already in the gallery as a gallery image, see the description above at 01.
One more tip:
In the menu with the three dots of the gallery you can also delete an already existing gallery image – then the folder icon will be displayed. If you want to choose another gallery image you can do so as described in the sections 01 and 02 above.
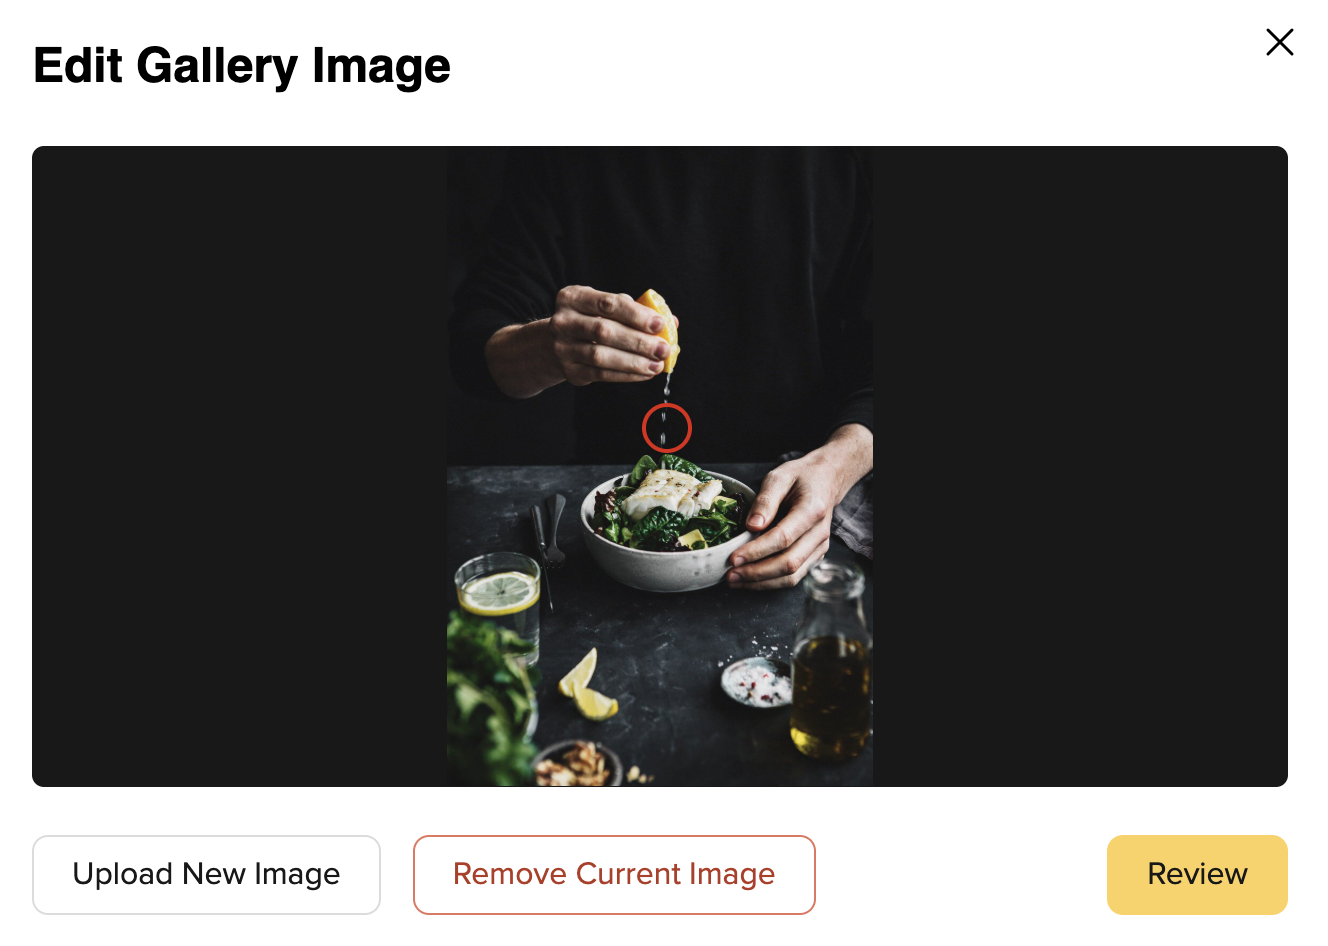
How can I crop the gallery image? And what is the focus point?
To ensure your gallery image is perfectly cropped for any possible use, we let you set a focus point for your gallery images.
Use the red circle to click and mark the most important part of your image, so your gallery image always shows the desired crop.
Of course, this does not only work with photos: You can also upload your own designs, lettering, etc. as JPG or PNG and use them as gallery images!