In the Lightroom plugin, you have to use the server address ftp.picdrop.com for your uploads to picdrop. If you have had the plugin installed for a while, there is a good chance that it is still configured to use ftp.picdrop.de.
The switch to ftp.picdrop.com is done in three quick steps, so you can continue to use the plugin without any interruption:
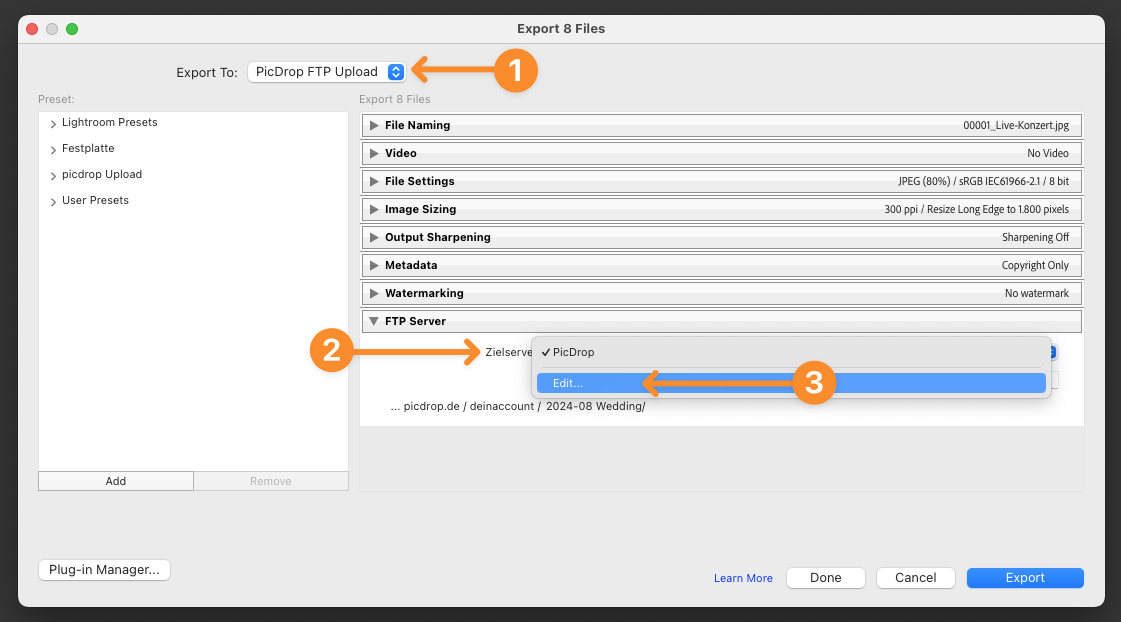
1 – Start an export from Lightroom
To do this, select at least one image in your Lightroom library and click on the Export … button at the bottom left.
2 – Open the settings for FTP File Transfer
To do this, select Export to: picdrop FTP Upload from the drop-down menu at the top.
At the bottom right in the FTP Server area, click on the menu for the destination server (Zielserver).
And click Edit … In the drop-down menu.
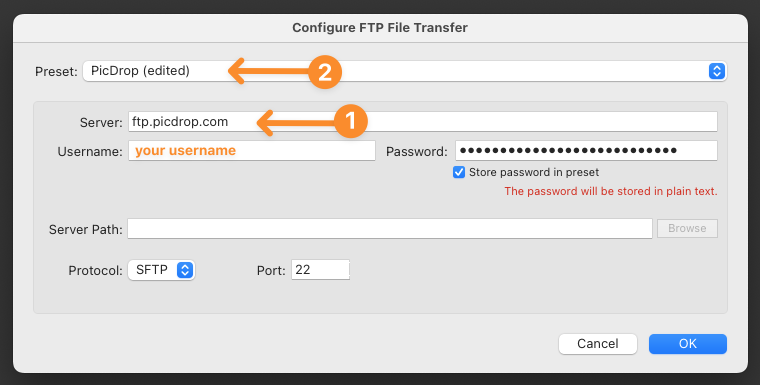
3 – Update the preset for FTP File Transfer
Change the server to ftp.picdrop.com
Leave the entries for username, password, protocol and port unchanged.
Attention: Do not click OK yet, but first click on Preset: picdrop (edited) and…
… select the last item in the drop-down menu, Update Preset “picdrop”
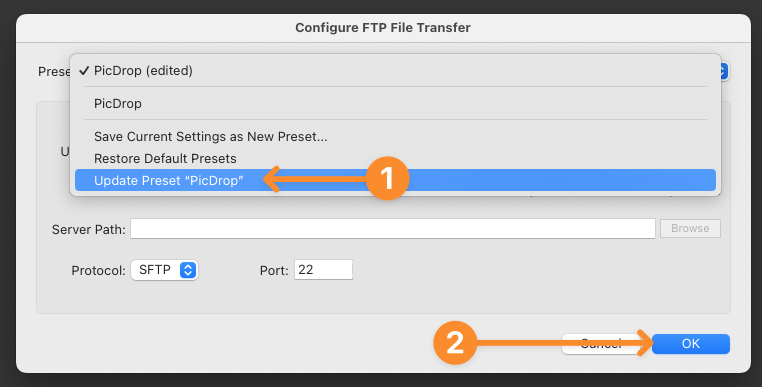
Now click OK at the bottom and …
… DONE!
The new server address ftp.picdrop.com is now permanently stored in your preset and you can continue to use the upload from Lightroom!