
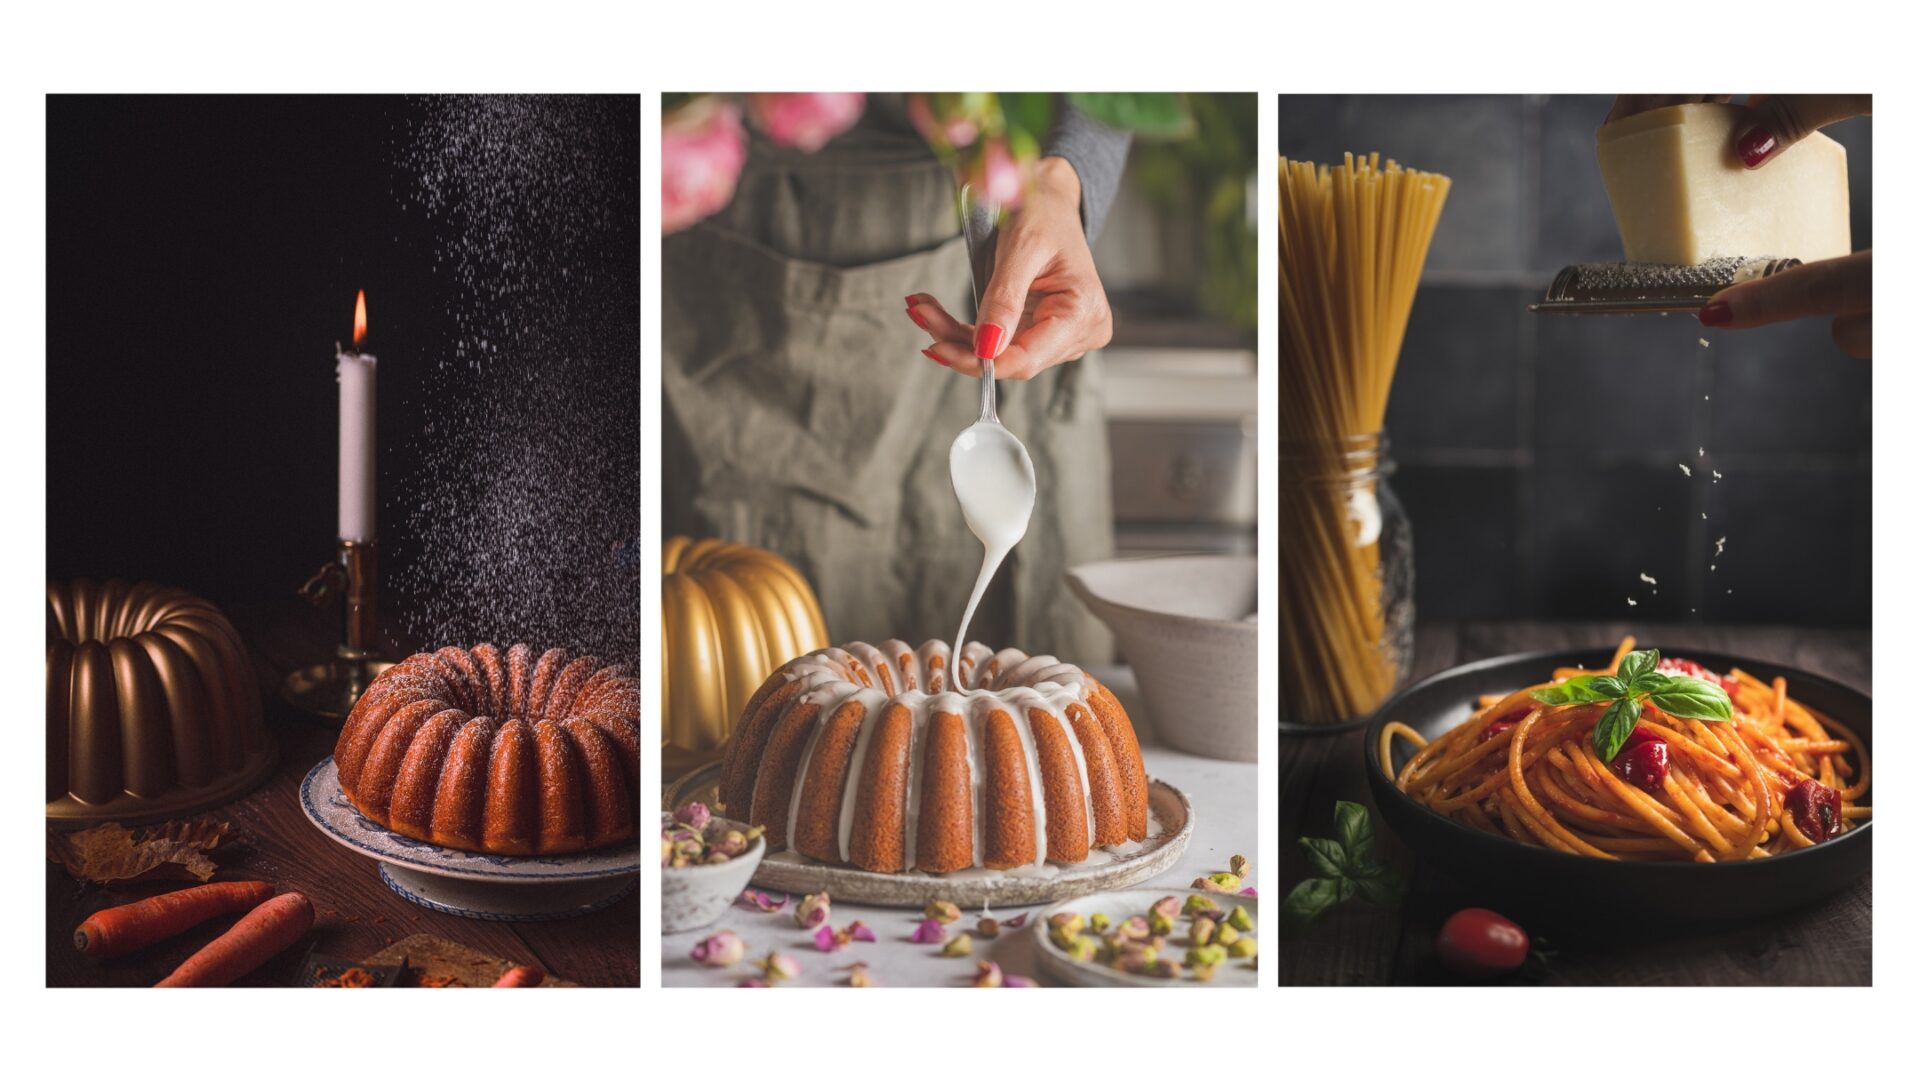
No matter how beautiful a dish looks, or how perfectly it has been styled and lit, it can still feel flat. A plate of food may be visually appealing, but movement is often what gives it energy, emotion, and a narrative. Add flour drifting through the air, cheese flakes falling onto a dish, or glaze pouring over the surface of a cake, and suddenly the image feels more alive. These small gestures create a sense of freshness, craft, and immediacy. It feels less like a finished plate and more like a moment unfolding.
Adding movement doesn’t have to require a complicated setup. With the right camera settings, a basic understanding of light, and a little practice with timing, you can start creating more dynamic food images straight away. In this guide, we’ll go through the gear, settings, and step-by-step techniques for two different ways of creating food in motion images.
Gear, Camera Settings and Lighting for Action Shots
A successful action shot comes from combining the right camera settings, effective lighting, and a setup that allows you to control and repeat the movement.
To photograph a subject in motion sharply, you need a fast shutter speed. The faster the shutter speed, the more frozen and defined the movement will appear. The weight of the ingredient also matters: lighter ingredients may fall more slowly, while heavier ingredients fall faster and usually require an even faster shutter speed to freeze the motion. I usually start around 1/200s and gradually increase the speed until I find the right balance for capturing splashes, pours, or falling ingredients with enough sharpness.
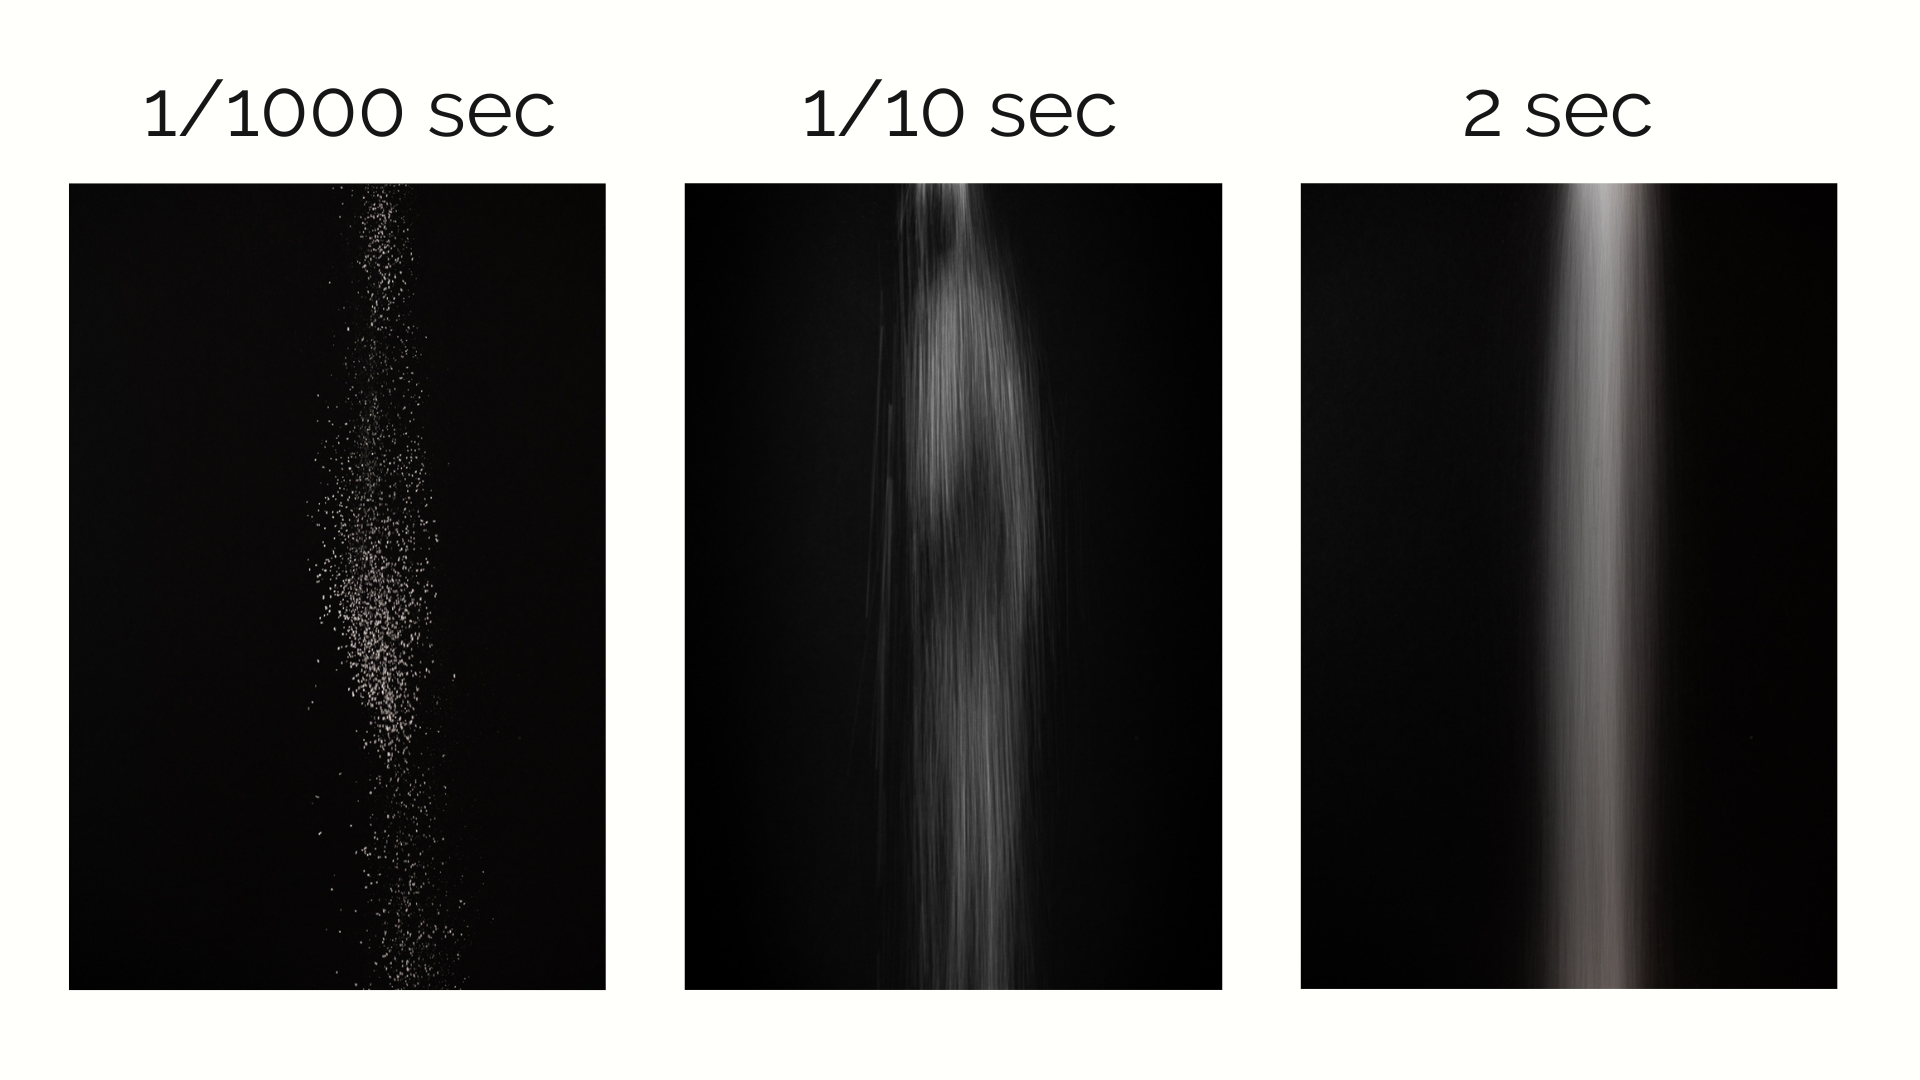
But motion does not always have to be frozen. If you want to create a softer, more blurred effect, for example with sugar falling through the air, you can use a longer exposure instead. This will allow the movement to stretch slightly in the frame and create a more dreamy or atmospheric result. Just remember that the faster the shutter speed, the less light reaches the sensor. So as you increase it, you will usually need to add more light to the scene.
Use burst mode so you capture a sequence of images rather than relying on one perfectly timed shot. Food movement is unpredictable, and having several frames to choose from gives you a much better chance of catching the best moment.
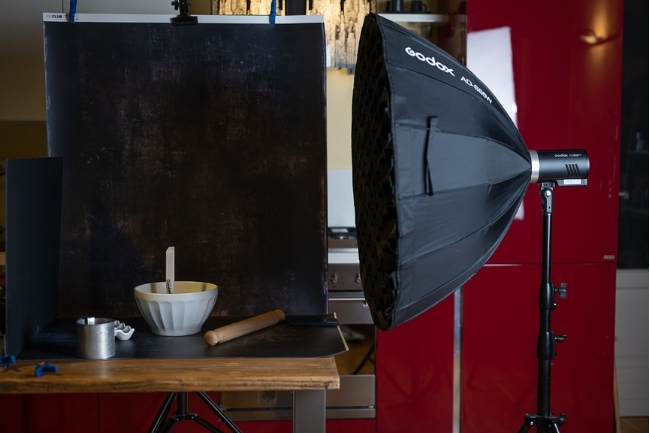
Pre-focusing is also important, but it can be difficult to focus on an empty space in the air where the ingredient will fall. What I like to do is place a stand-in subject exactly where the action will happen, set my focus point on that, then remove it while keeping the action in the same line of focus. Once the focus is set, I switch to manual focus so the camera doesn’t try to refocus when I press the shutter. This gives me much more control and makes the result more consistent.
Light is just as important. When you increase your shutter speed to freeze motion, less light reaches the sensor, which means the scene needs to be lit more strongly. Ambient light is often not enough for high-speed food action, especially if you want to freeze splashes, falling ingredients, or quick hand movements. This is where flash can make a big difference. An off-camera flash or LED-light helps freeze the movement, while side light or backlight makes liquids, steam, flour, sugar, and other small particles stand out more clearly. If you are working with natural light, place your setup close to a bright window and choose a moment when there is plenty of light coming in. It can work beautifully for softer movement, but for very fast action, flash will usually give you more control and consistency.
A tripod is also useful, not only for keeping the image sharp, but for keeping your composition exactly the same while you repeat the action several times. This makes the process much easier, especially if you need several attempts or want to combine a clean base shot with an action shot later in editing.
Finally, choose a simple background with enough contrast to make the movement visible. A dark backdrop will help milk, flour, sugar, or steam stand out, while a lighter background works better for darker subjects like coffee, chocolate, or sauce.
Capturing Dusting Flour
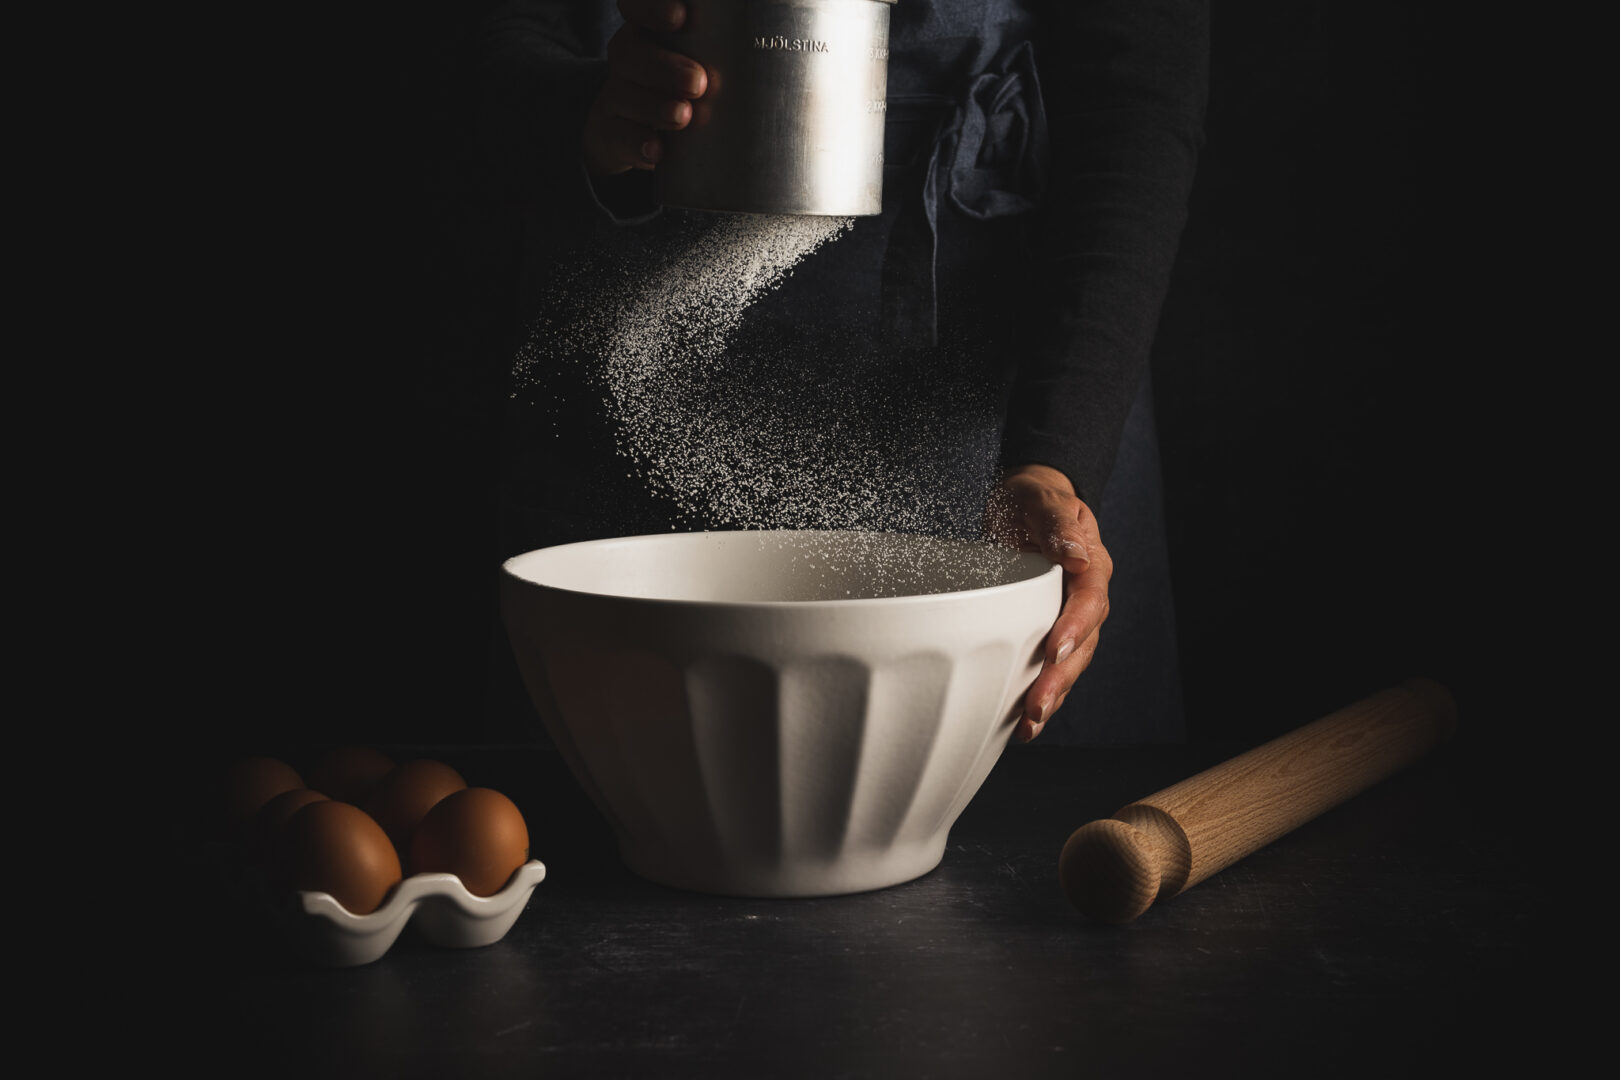
In this example, we’ll look at how to capture flour being dusted into a bowl. Sprinkling an ingredient like flour is one of the easiest ways to bring movement into a food photo, but because the flour is not there before it falls, it can be difficult to focus on.
To solve this, I use a dummy subject. In this case, I placed a pair of chopsticks exactly where the flour would fall. With my camera on a tripod in front of me, I focused on the chopsticks first, then switched my lens to manual focus so the focus point stayed locked. After that, I removed the chopsticks and dusted the flour in the same spot.
Instead of dropping everything in one quick motion, move your hand gently from side to side, keeping the movement parallel to the camera. This helps create a softer, more graceful S-shaped trail as the flour falls.
Shoot in burst mode and repeat the movement several times. Each attempt will look slightly different, and often the best frame is the one you didn’t expect. Use a fast shutter speed to freeze the falling particles, and make sure your light is strong enough to separate the flour from the dark background. Side light or backlight works especially well, as it catches the tiny particles in the air and makes the movement more visible.
A Different Technique: Blending for a Perfect Motion Trail
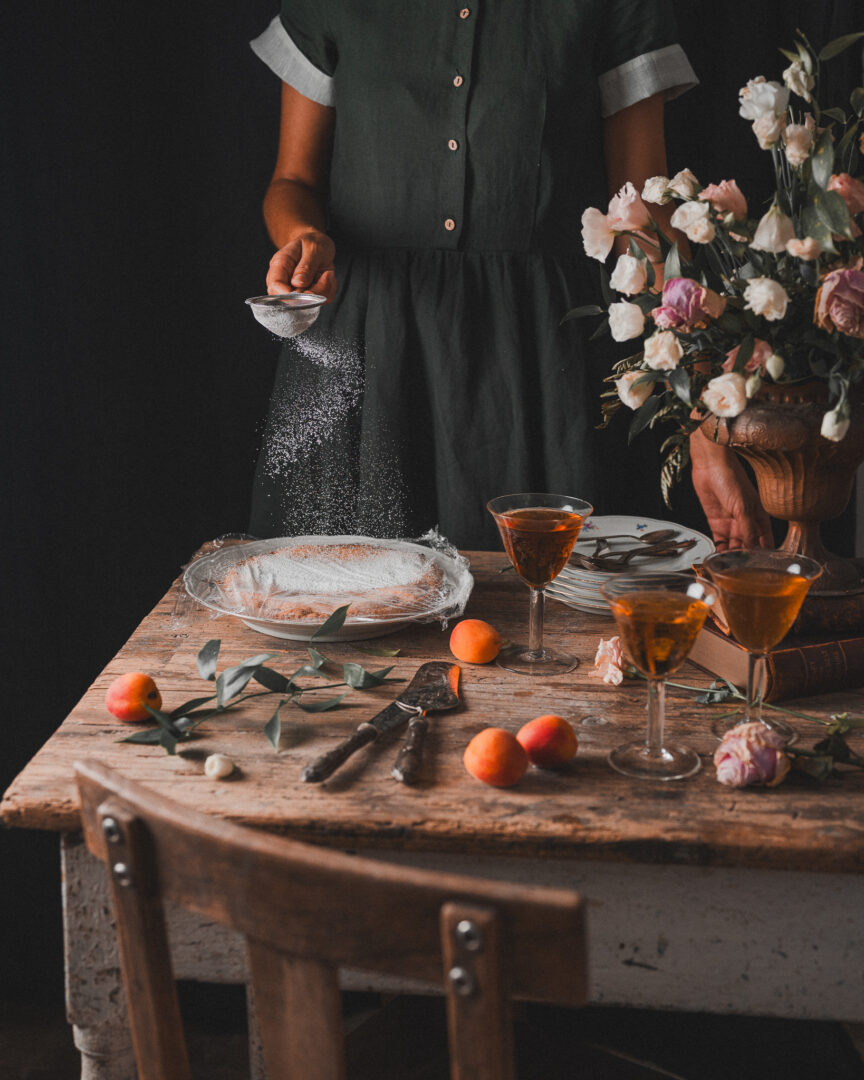
For this shot, I set up my tripod directly in front of the scene, shooting with a 50mm lens at f/8, ISO 100 and a shutter speed of 1/200. My goal was to capture a graceful S-shaped trail of sugar as it fell onto the cake.
The challenge is that getting that perfect curve usually means dusting the cake with sugar over and over until one throw creates the perfect motion trail. But each attempt adds more sugar to the cake, and after a few tries, it’s no longer clean enough to photograph.
The solution was to separate the two elements entirely. First, I photographed the cake on its own, clean and untouched. Then, I covered the cake with cling film to protect it, and kept dusting sugar over it, shot after shot, until I captured the exact S-shaped trail I was after, frozen mid-fall.
In Photoshop, I placed both images as separate layers, the sugar shot on top, the clean cake underneath, and added a layer mask to the top layer. Using a soft brush on that mask, I painted away the cling-film-covered cake, revealing the clean cake from the layer beneath while keeping the falling sugar fully intact above it.
The result: a cake that looks completely untouched, paired with a perfectly captured trail of falling sugar, something that would have been almost impossible to get in a single frame.
Bring Life to Your Food Photography
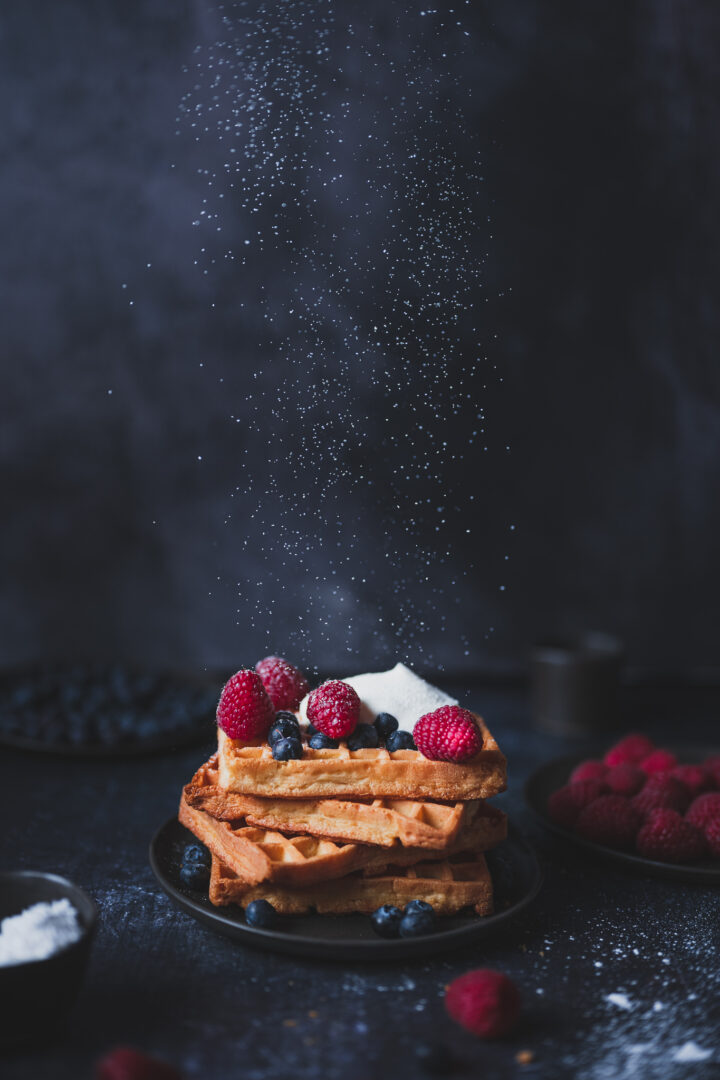
A still image can be beautiful, but movement is what makes it feel alive. A drip of sauce, the shape of dusted flour, a curl of steam, these small moments suggest that something was happening when the photo was captured. They bring the viewer closer to the food and make the image feel more sensory, more immediate, and more inviting.
As we’ve seen throughout this guide, capturing movement starts with the technical basics: a fast shutter speed, light, and a camera steady on a tripod and on burst mode so you can repeat the action until you get the frame you want. But beyond the settings, it also comes down to patience and small adjustments. With dusting flour or sprinkling powdered sugar, for example, the way you move your hand can be the difference between a messy cloud and an S-shaped motion trail.
For more complex shots, like a perfectly timed fall of sugar or flour, that same patience continues into post-production. Combining a clean base image with an action shot in Photoshop can give you more control over a moment that would be very difficult to capture perfectly in one single frame.
Next time you set up a scene, don’t stop at styling the plate. Pour, splash, sprinkle, slice, and let the motion help tell the story.