In your account settings (“Your watermarks“) you can upload your logo or other graphics and create multiple watermarks with just a few clicks. You can set the place for the watermark and adjust its size and opacity to your needs.
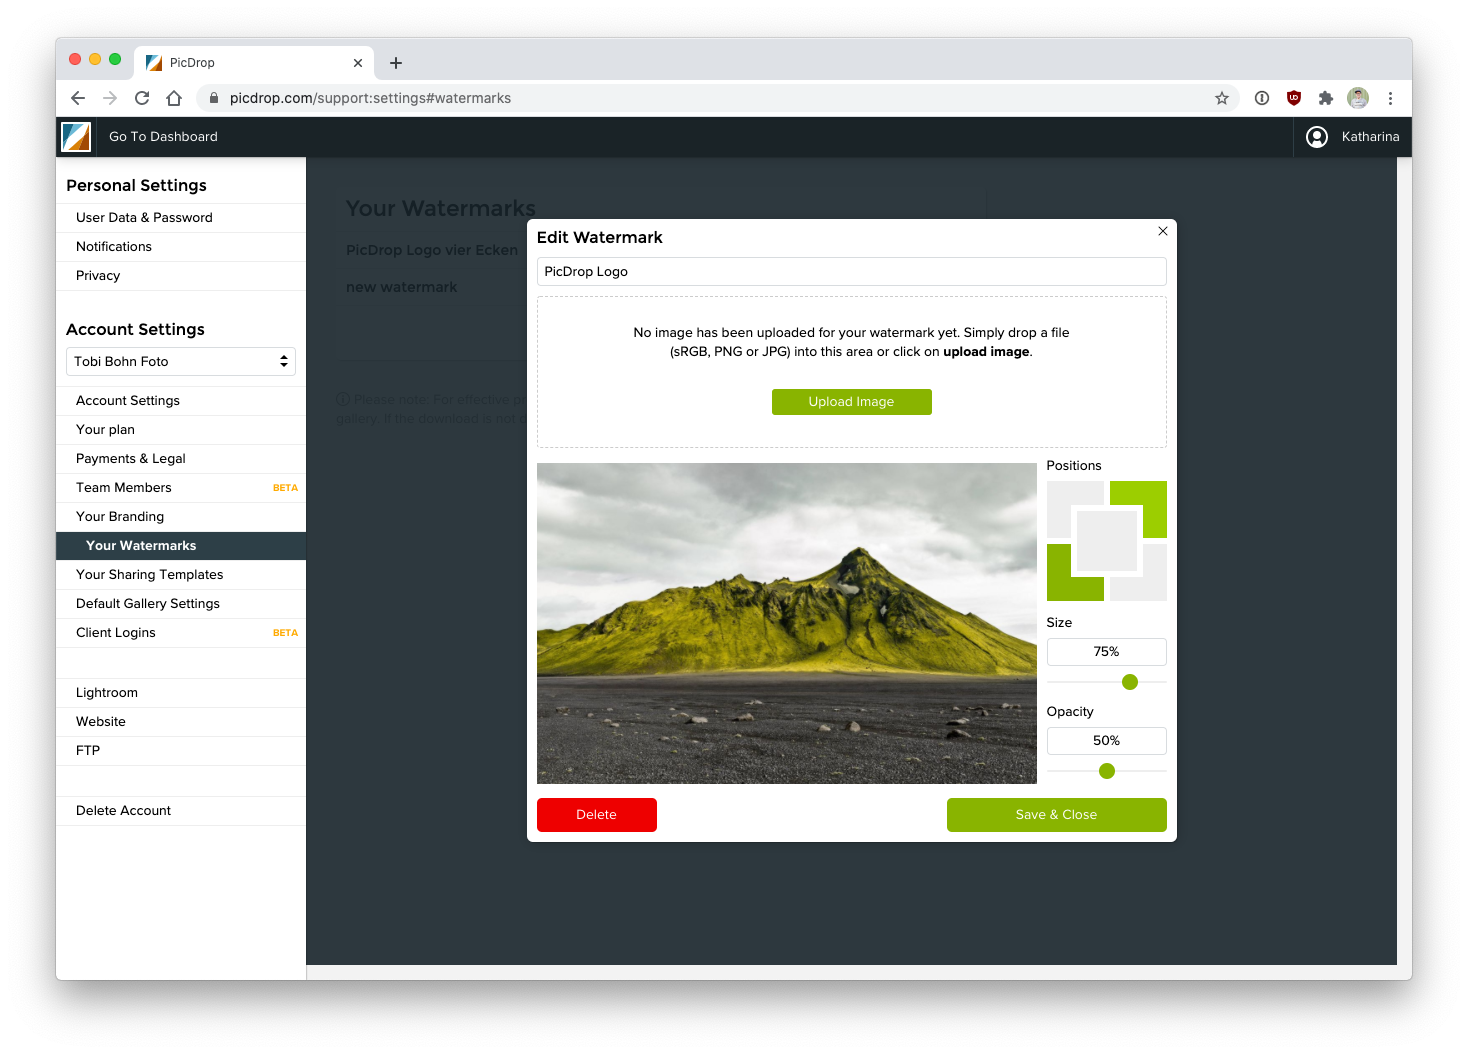
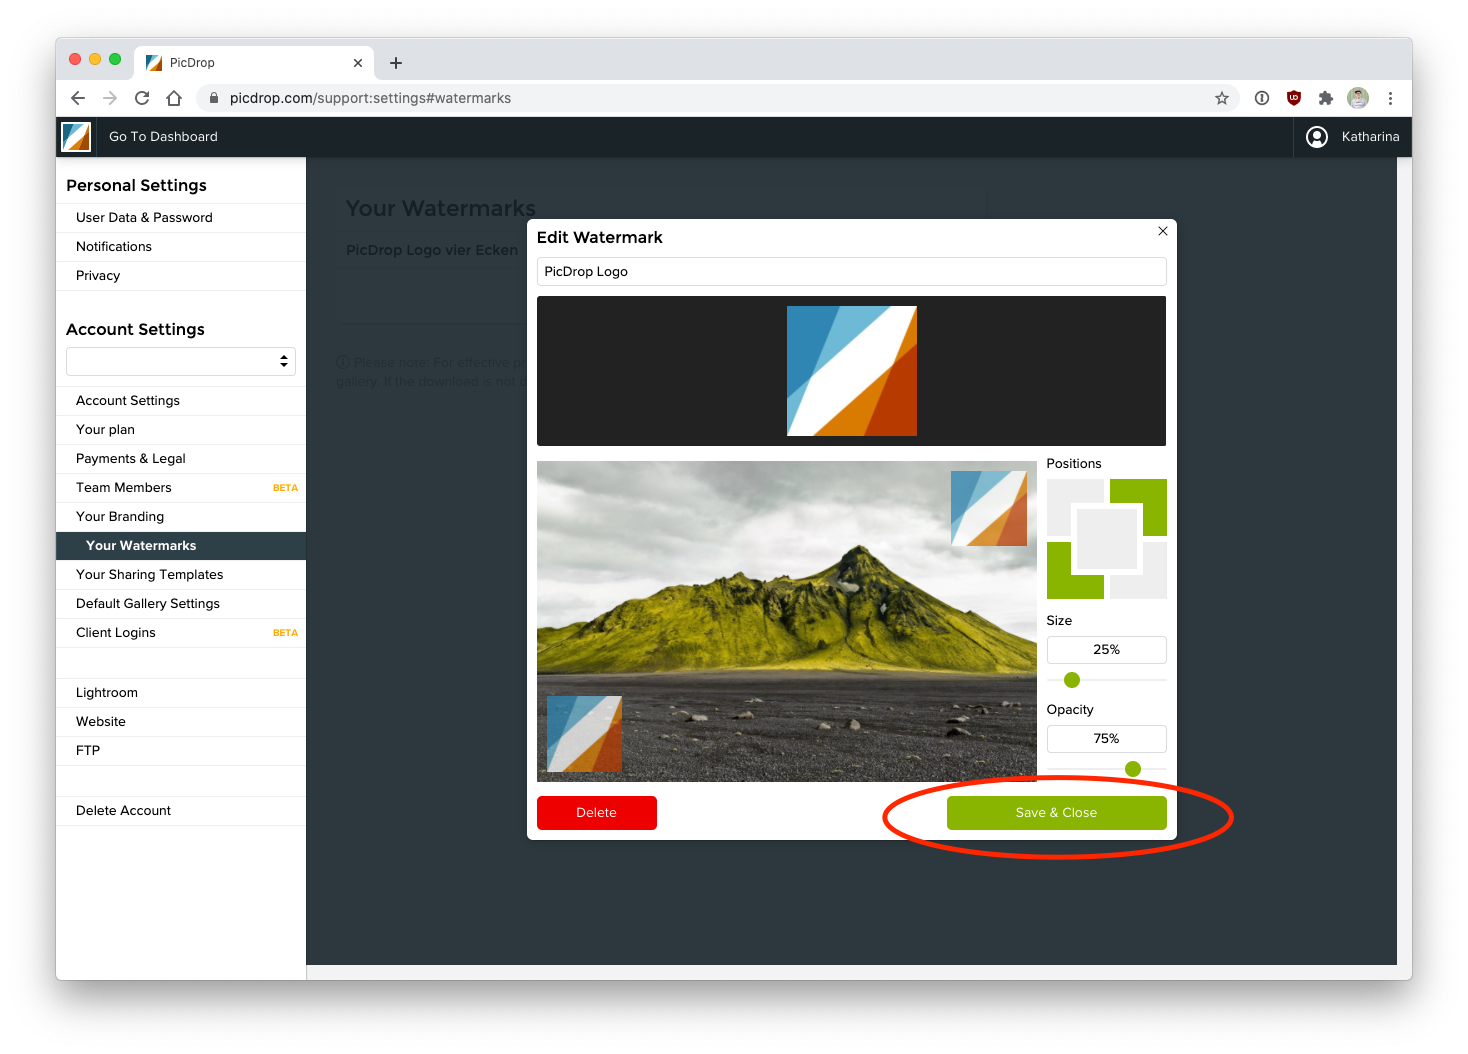
Don’t forget to “Save & Close” your new watermark settings.
To apply watermarks to all the images in a gallery just navigate to the gallery settings of each gallery. You can activate your watermarks in the “Security” section of your gallery settings.
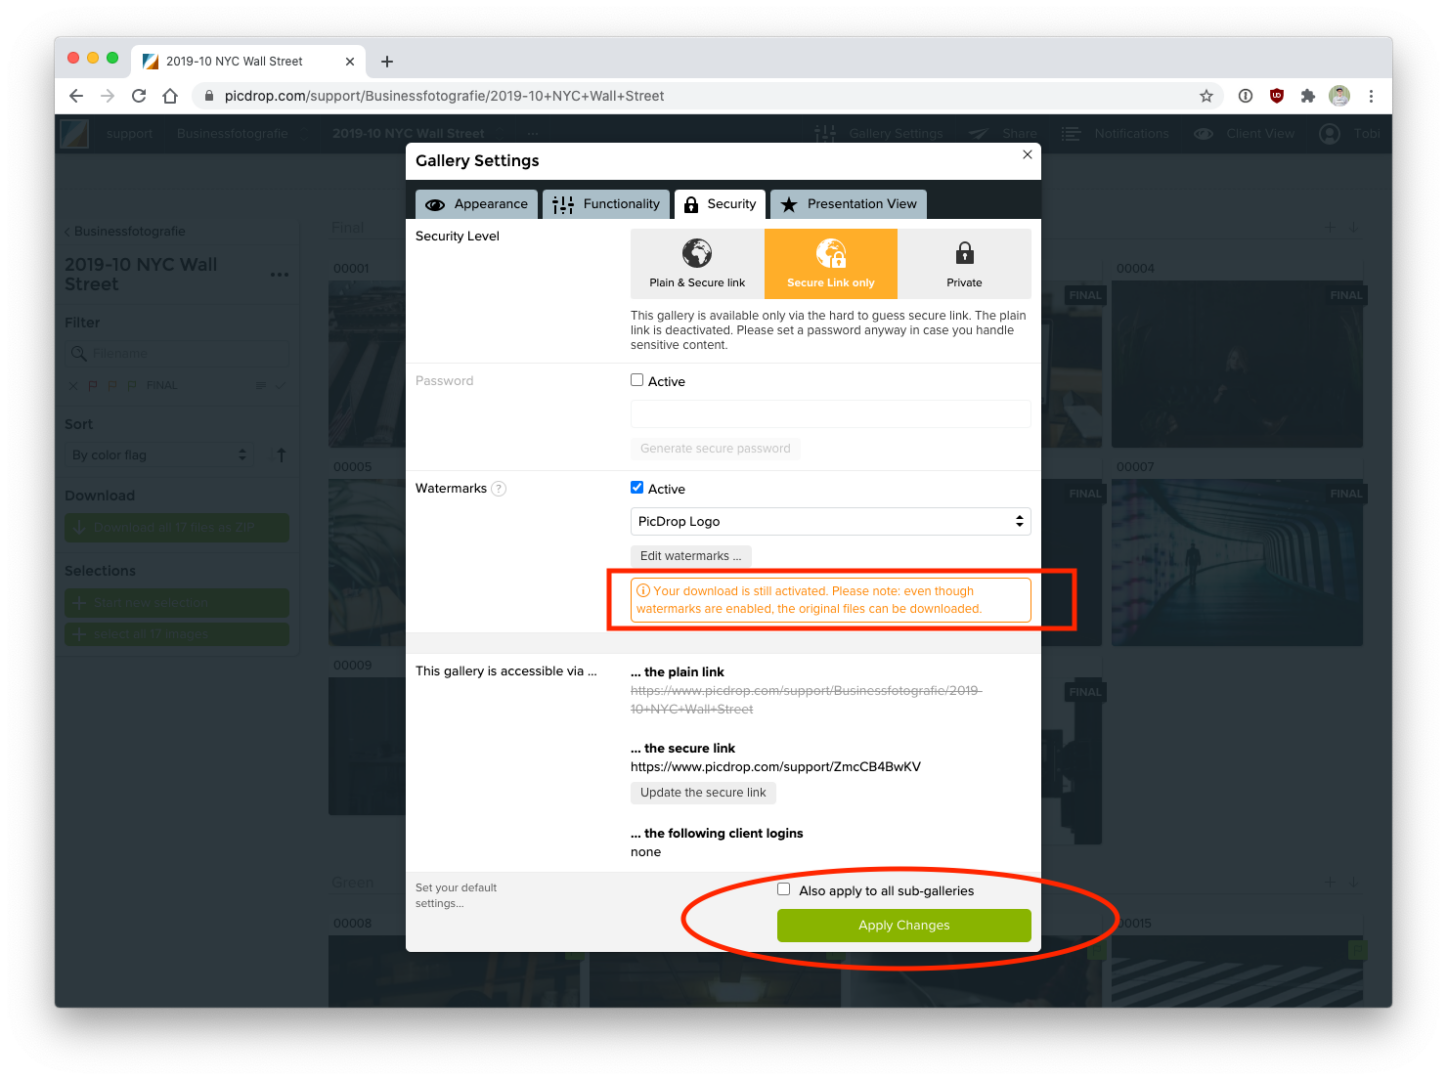
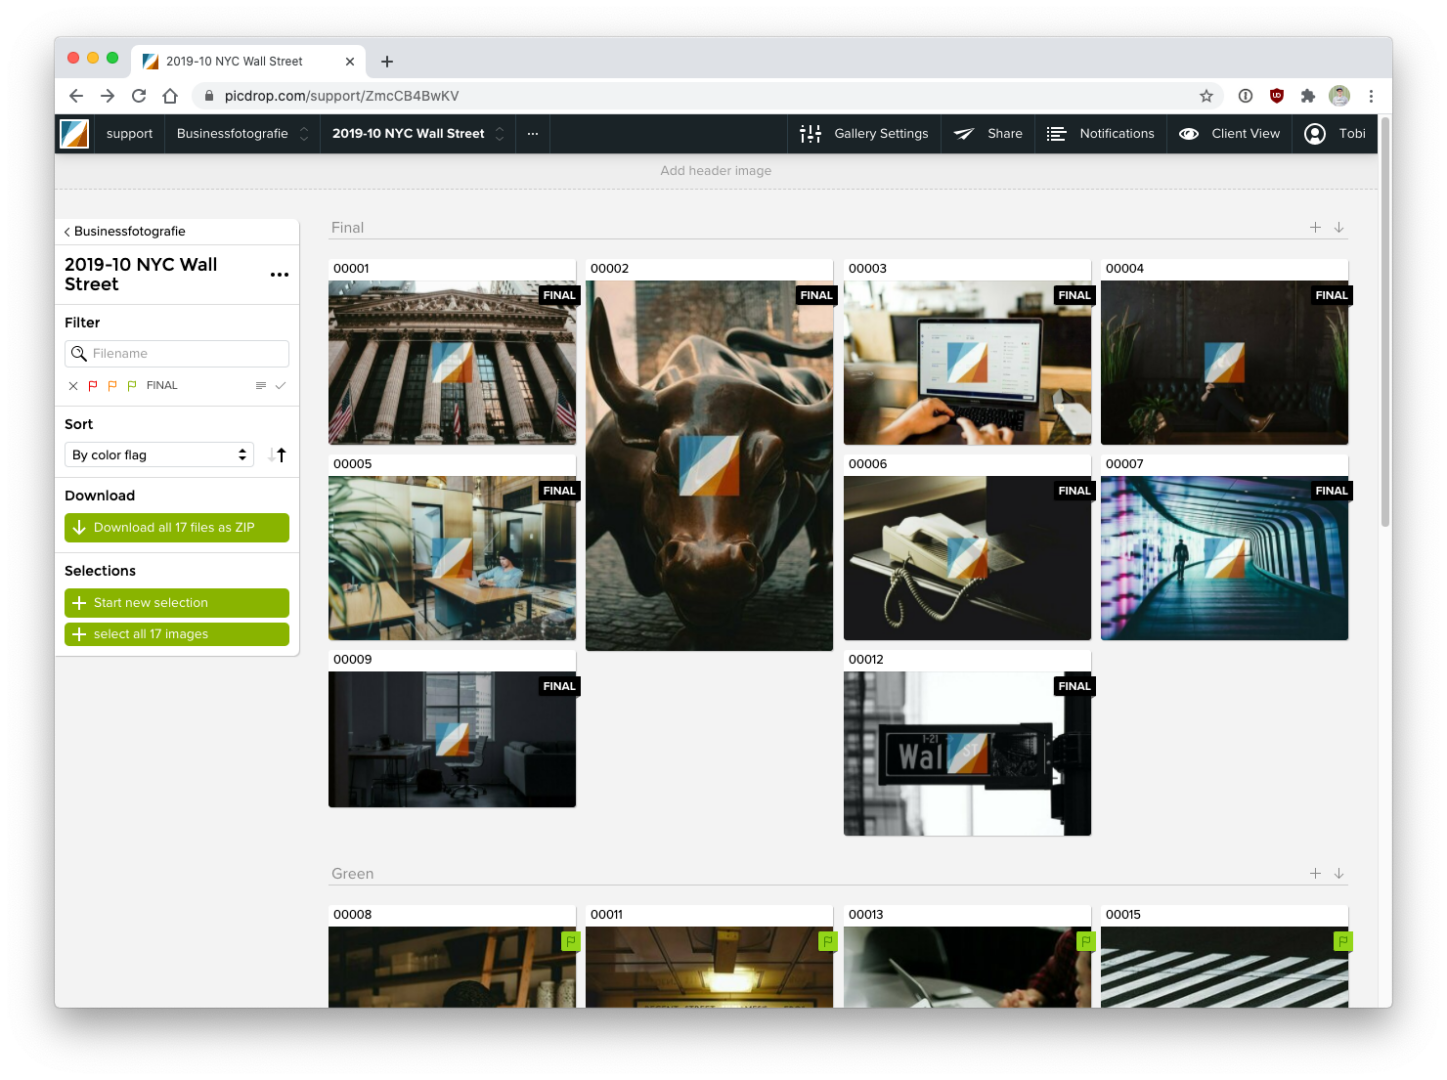
After you hit “Apply Changes” wait for a few seconds to see the watermarks appear on each preview image in your gallery. It couldn’t be easier.
Note: the watermarks will “only” protect the thumbnails and previews in picdrop, so your clients can’t take screenshots or steal the pictures in other ways. If you activate the download of the original images at the same time, these will not be protected by watermarks because picdrop will never modify your originally uploaded images. Please note that watermarks can only be applied to image files – they are not available for videos, documents, or any other supported file types.
Find a German introduction video to our watermarks here: