In this article you’ ll learn how to create galleries so that you can not only send and share images with third parties, but also receive images from third parties just as easily.
With picdrop, this is just as easy as sending pictures.
The fast way 1: prepare a gallery, share the link and receive uploads
- Create a new gallery or open an existing gallery in which you want to receive files.
- Open the gallery settings and activate the “Client Upload” function in the “Edit Mode” section.
- Share the gallery link with the person you want to receive files from.
- Done. The person can now simply drag and drop their own pictures and videos into the gallery.
- Attention: already existing pictures and videos can be deleted or overwritten without warning if they have the same file name.
As admin you will be informed about events and new uploads by mail and don’t have to worry about anything.
The long-term and convenient way 2: invite colleagues and externals to picdrop as team members
With the team member function included in the business plan, you can invite both internal members of your team as well as external colleagues, i.e. suppliers, photographers, videographers, etc. to your picdrop account. (This works perfectly even if they already use their own picdrop account, more on this below).
The big advantage compared to way 1 is: your team members can create new folders/galleries on their own and also delete files – if you allow them to do so. This way you don’t have to create empty galleries for deliveries and you will have less hassle.
This is how it works:
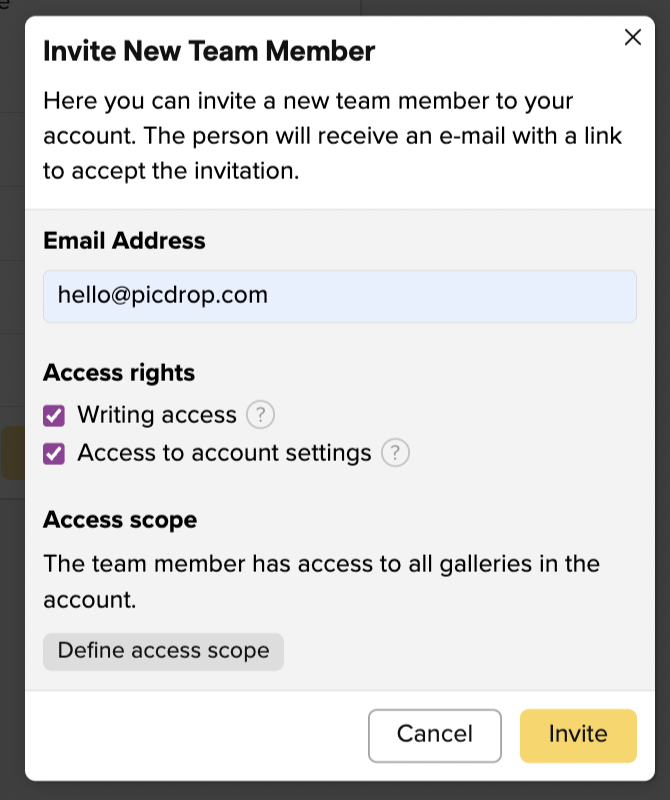
- Create a new team member in your account settings (possible from picdrop plan Business S).
- When creating a new team member, make sure that he or she has writing rights.
- This allows your new team member to:
- create galleries,
- delete galleries,
- edit galleries,
- upload files,
- delete data,
- change the settings of the galleries
- This allows your new team member to:
- If you don’t want the new team member to have access to all your galleries, you can also set or limit the scope of access folder by folder.
- Invite the team member and wait until he or she accepts your invitation.
Afterwards, your team member can log-in to your picdrop account at any time or switch from his/her own picdrop account to yours using the account switch button in the upper right corner. He/she will only see and get access to the part of your account that you have shared and can create new galleries and/or upload new files within these folders.
You as admin will be informed about events and new uploads by mail and you don’t have to worry about anything.
Nice and simple, isn’t it?