picdrop for Advanced Users
What exactly are client logins and when are they useful?
Do you work with the same clients over and over again?
Then you (or your clients) surely have been in the situation to pick out the exact link that belongs to the current shoot from a long list of gallery links.
This is much easier with a client login
With a client login, you give these clients a place where they can find all their galleries at any time with just one login code - no more saving individual gallery links.
Here we explain exactly how to create a new client login and how to add individual galleries to the client login.
And how does the client login work for my clients?
Your clients will receive their individual access code from you. They enter this access code on the start page of your picdrop account at picdrop.com/your-username.
After clicking on "Login" your customers will see a personal dashboard page listing all the galleries you have shared with them.
What else can client logins be used for?
Of course, you can use a client login in a completely different way. For example, create a client login to which you add all your portfolio galleries with a specific theme. Then you just send the appropriate access code to potential buyers. Or do you regularly sell your images or licenses for your images? Then you can, combine all your galleries that you offer for licensing in one client login.
Do I have to use client logins?
No, of course not! The client logins are just an additional way for you to deliver your galleries.
If you and your clients work with the usual links to your picdrop galleries and the workflow works for you, you can continue to work in the same way.
Link to this entryCan I set up multiple admin logins (e.g. for my employees or team members)?
You can use team members to invite other people to collaborate in your picdrop account.
You can invite one team member on the Pro+ plan. With our Business plan, it's possible to work with even more people in one picdrop account.
You can find more information about how team members work here.
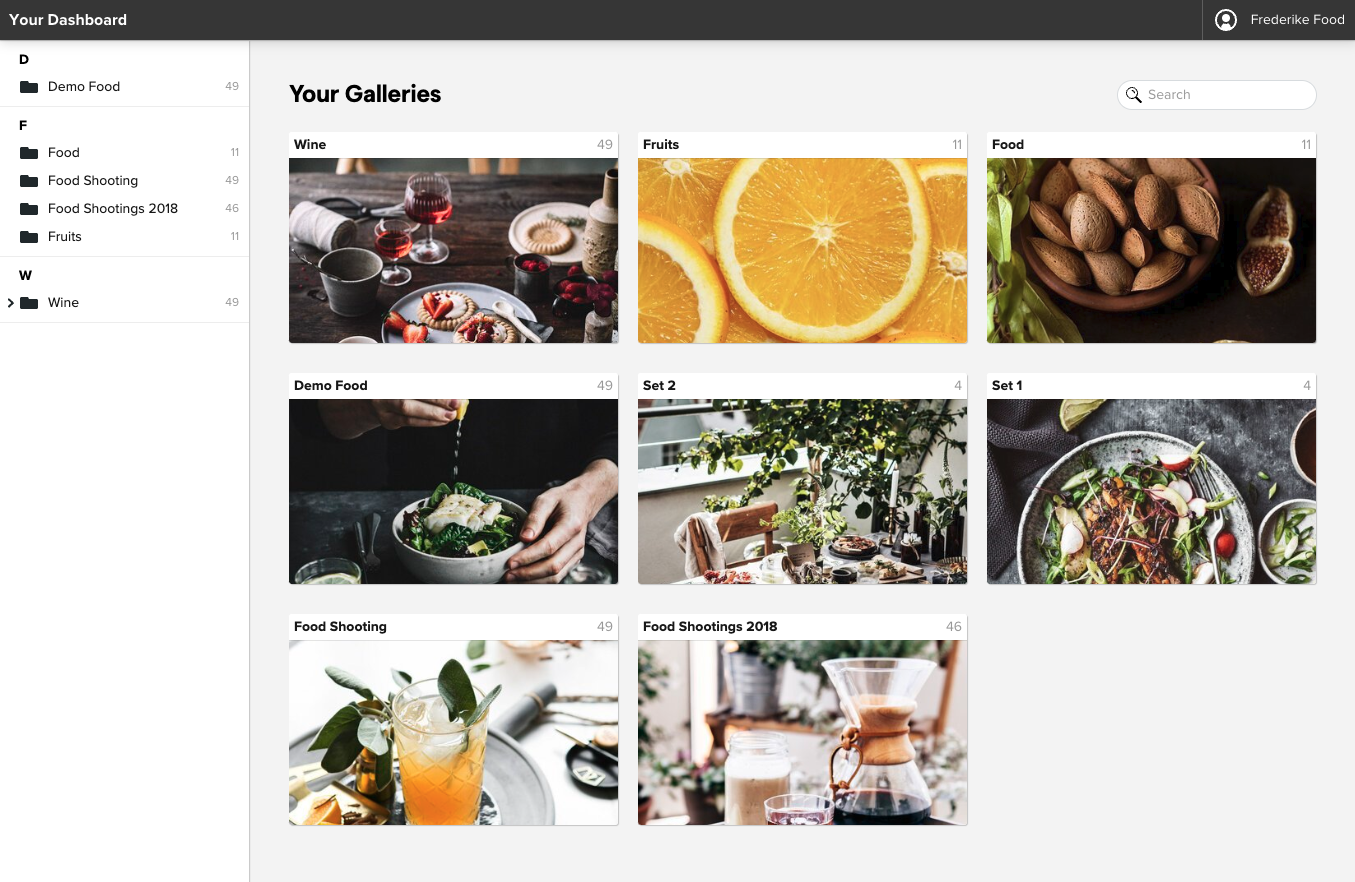
Link to this entryHow do I filter color-coded images in Lightroom, Capture One, Photo Mechanic, Finder and Explorer?
You've probably seen how to filter out your clients' image selections in Lightroom, Capture One, Photo Mechanic, Finder, and Explorer. The whole thing is not only possible with image selections but also with all color-coded images.
Many image editing programs allow you to use the file search to display exactly the images of an image selection you or your clients made in picdrop. This saves you the trouble of searching for each individual file. Here we show you how to do it:
Copy the filter text to your clipboard
Filter out all images with the desired color flags using the filter function on the left side. Now you see only the images with the desired color flag.
Click on "select all images" (bottom left) or use the keycombination of cmd-A or Ctrl-A to select all currently displayed images.
You have now created a selection that you can use to filter out the images locally on your mac / PC.
Click on the "Export selection" icon in the selection menu, bottom right. When you are logged in to your account you will find the various filter texts to filter out this selection in Lightroom, Capture One or in your Finder / Explorer.
Optionally, you can save this selection permanently in picdrop to make it easier to find it again later.
Once you have copied the list of filenames to your clipboard, please continue on your computer in your tool of choice:
Filtering the images in Lightroom Classic
- Open the folder of the shooting in Lightroom’s Library mode.
- Press the "<" key (to the left of the Z) to display the filters at the top.
- Select the "Text" category there.
- Select "Filename" and "Contains" from the drop-down menus.
- Paste the filenames from your clipboard into the search field.
- Now you will only see the images you have saved in the selection.

You can now save the filtered images in a new collection or mark them with stars / colors for your further workflow.
Filtering the images in Capture One
In Capture One, you can search for your images in multiple places using the exported folter text. To do this, open a folder or collection in Capture One with the images you want to filter. Then you have three options:
1st option: Search in Browser
- Press cmd-F or ctrl-F to open the search in the browser.
- Paste the text from the clipboard directly next to the magnifying glass.
- The images you searched for will be displayed in the browser.

2nd option: Filter-tool
- Open the Filter tool in the toolbar.
- Paste the text from the clipboard next to the magnifying glass.
- Only the searched images will be displayed in the browser.
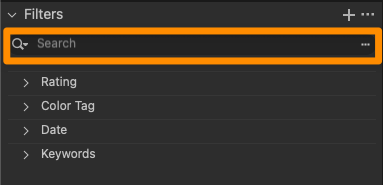
3rd option: Select by file name list
- Open in the menu bar the item Select > Select by > File name list ...
- Paste the text from the clipboard into the search field.
- Select "Space" as separator under the search field and "Ignore file extension".
- Click OK.
- Only the searched images will be displayed in the browser.
Done! You can now save the displayed images as your own collection or mark them with a color / stars.
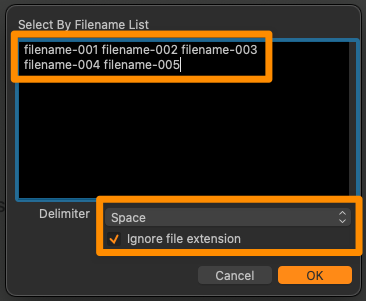
Filtering the images in Photo Mechanic
Open the corresponding project folder in Photo Mechanic.
Paste the filter text from your clipboard into the search box (via Edit > Find... menu or cmd-F on Mac or Ctrl-F on Windows) and set the following search options:
Find: Any of the words
In: All items
Searching: Filenames
After clicking "Find" in the lower right corner, Photo Mechanic will now select all photos of your choice from picdrop and you can continue working with them.
Please note that the search in the upper left corner of Photo Mechanic ("Search my Mac") cannot be used for these steps.
Filtering your images in macOS Finder and Windows Explorer
Open the folder containing your images
Click into the regular search field
Copy the list of filenames into the search field
You will now only see the images that were previously saved in the selection.
Please note that the filter text in Explorer can only hold a maximum of 259 characters.
The filter text in Finder is limited to 2048 characters or 99 files.
Link to this entryHow do I filter selections in Lightroom, Capture One, Photo Mechanic, Finder and Explorer?
Many image editing programs allow you to use the file search to display exactly the files of a selection you or your clients made in picdrop. This saves you the trouble of searching for each individual file. Here we show you how to do it:
Copy the filter text to your clipboard
Open the selection in the gallery that you want to filter out on your computer. Or mark the files with the selection tool (blue plus sign in the overview of your gallery).
Click on the "Export selection" icon in the selection, bottom right. When you are logged in to your account you will find the various filter texts to filter out this selection in Lightroom, Capture One or in your Finder / Explorer.
Copy the corresponding file list / filter text to your clipboard.
Now continue on your computer in the program of your choice:
Filtering the files in Lightroom Classic
- Open the folder of the shooting in Lightroom’s Library mode.
- Press the "<" key (to the left of the Z) to display the filters at the top.
- Select the "Text" category there.
- Select "Filename" and "Contains" from the drop-down menus.
- Paste the filenames from your clipboard into the search field.
- Now you will only see the files you have saved in the selection.

You can now save the filtered files in a new collection or mark them with stars / colors for your further workflow.
Filtering the files in Capture One
In Capture One, you can search for your files in multiple places using the exported folter text. To do this, open a folder or collection in Capture One with the files you want to filter. Then you have three options:
1st option: Search in Browser
- Press cmd-F or ctrl-F to open the search in the browser.
- Paste the text from the clipboard directly next to the magnifying glass.
- The files you searched for will be displayed in the browser.

2nd option: Filters tool
- Open the Filters tool in the toolbar.
- Paste the text from the clipboard next to the magnifying glass.
- Only the searched files will be displayed in the browser.

3rd option: Select by file name list
- Open in the menu bar the item Select > Select by > File name list ...
- Paste the text from the clipboard into the search field.
- Select "Space" as separator under the search field and "Ignore file extension".
- Click OK.
- Only the searched files will be displayed in the browser.

Done! You can now save the displayed files as your own collection or mark them with a color / stars.
Filtering the files in Photo Mechanic
Open the corresponding project folder in Photo Mechanic.
Paste the filter text from your clipboard into the search box (via Edit > Find... menu or cmd-F on Mac or Ctrl-F on Windows) and set the following search options:
Find: Any of the words
In: All items
Searching: Filenames
After clicking "Find" in the lower right corner, Photo Mechanic will now select all files of your choice from picdrop and you can continue working with them.
Please note that the search in the upper left corner of Photo Mechanic ("Search my Mac") cannot be used for these steps.
Filtering your files in macOS Finder and Windows Explorer
Open the folder containing your files
Click into the regular search field
Copy the list of filenames into the search field
You will now only see the files that were previously saved in the selection.
Please note that the filter text in Explorer can only hold a maximum of 259 characters.
The filter text in Finder is limited to 2048 characters or 99 files.
Link to this entryI need more storage space. Is that possible?
Yes, of course!
If you reach the storage limit in your Pro plan or your Business plan, you can book additional storage space for your picdrop account:
In the Pro plan, you can expand your storage space at any time and as often as you like in 250 GB increments.
For each 250 GB you pay 7.99 € net per month in addition to the basic price of your Pro plan.
For your picdrop account in the Business plan, you can expand your storage space in 1 TB increments.
You pay 50,00 € net per month for each 1 TB storage expansion.
Please send us an email to hello@picdrop.com and let us know how much additional storage you need.
Link to this entryThe picdrop contact sheet
We have included this feature of analogue photography in picdrop, so that every photographer has the possibility to save a contact sheet of his or her galleries from within picdrop. There, e.g. printed out, notes can also be entered by hand.
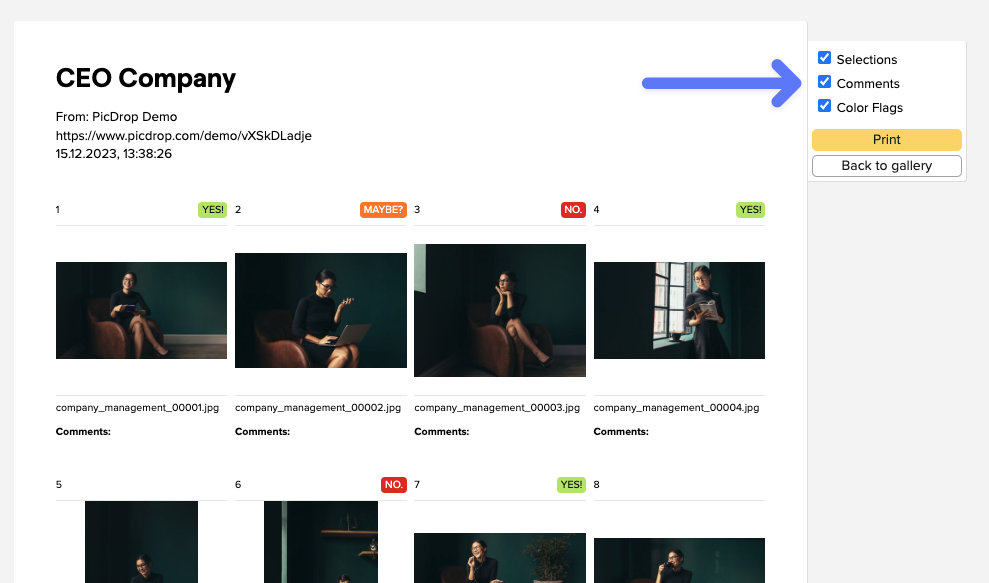
What is a contact sheet used for?
A contact sheet is a great way to compare, evaluate and get an overview of your images - exactly because the images are shown in a small size and all together.
On the contact sheet you have all images of the gallery at a glance and can also choose whether the color markings, comments and selections from picdrop should be directly visible.

The contact sheet always contains all images of your gallery, as already in analogue times the whole film roll was content of the contact sheet.
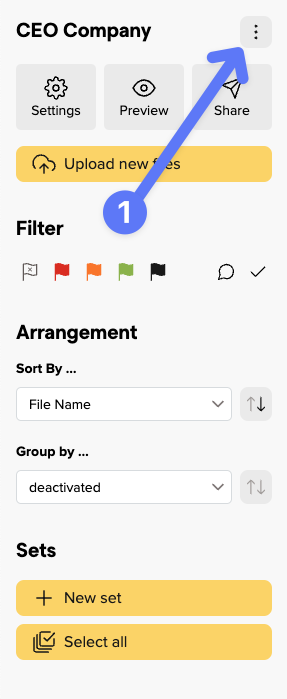
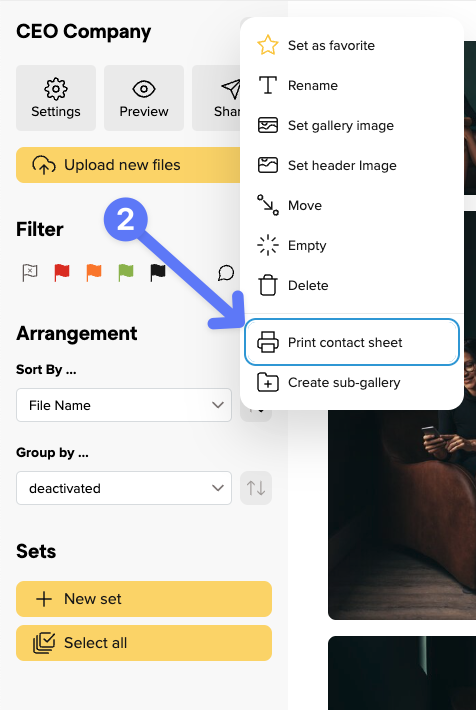
How do I create a contact sheet in picdrop?
You can create a contact sheet in every gallery by clicking on "print contact sheet" in the gallery menu...
... and then either print it, or save it as PDF with the help of the system dialogue.
How do I setup my FTP client?
ATTENTION
You can only use the FTP connection to your picdrop account if your picdrop account was registered before June 2022.
For accounts registered after June 2022, please use the upload directly in your browser.
______
Your FTP login data can be found in your account settings.
Setting up your FTP accounts isn’t rocket science and in most cases the same procedure. There are differences in the applications though. We compiled a list of the most common FTP clients and provide you with a step by step guide on how to set them up.
One more thing before you start: if your FTP program has problems uploading using Windows, please disable the option to run uploads in .filepart format. (Applies mainly to WinSCP/Putty)
Cyberduck (Mac)
Click on “New Connection” on the top right
Enter the following details:
Connection type: SFTP (SSH Connection)
Server: ftp.picdrop.de
Port: 22
Username: your picdrop username
Password: your picdrop password
Click on “Connect”
Your picdrop-account can now be found in your bookmarks and can be opened anytime.
Transmit (Mac)
Click on “Favorites”
Click the + sign on the bottom edge
Enter the following details:
Protocol: SFTP
Server: ftp.picdrop.de
Username: your picdrop username
Password: your picdrop password
Click on “Save”
Double click the just created item to connect to picdrop
Your picdrop-account can now be found in your bookmarks and can be opened anytime
Attention: When renaming and moving files and folders in Transmit there might be some issues. This is a Transmit issue, we can not solve on our. Additonally, only the latest version of Transmit is compatible with picdrop. Version 4 and older will produce an error when uploading to picdrop’s servers.
Forklift (Mac)
Click on the star in the “Favorites” menu at the top
Click the + sign on the bottom edge
Enter the following details:
Protocol: SFTP
Name: picdrop
Group: Favorites
Server: ftp.picdrop.de
Username: your picdrop username
Password: your picdrop password (please leave the field “Ask” blank)
Click on “Save”
Double click the just created item to connect to picdrop
Your picdrop-account can now be opened anytime via the “Favorites” in Forklift.
Filezilla (Windows)
Click on “File”
Click on “Servermanager”
Click on “New Server”
Enter the following details:
Server: ftp.picdrop.de
Port: 22
Server Type: SFTP - SSH File Transfer Protocol
Logon Type: Normal
User: your picdrop username
Password: your picdrop password
Click on “Connect”
You can now use the new picdrop-login via the Server Manager.
Link to this entrypicdrop for Advanced Users
To learn many useful details of picdrop, we have put together a guide for advanced picdrop users. You can find it here.
Have fun exploring and trying it out!
Link to this entry